11 Kid-Friendly Easter Cookie Recipes to Bake Together is your go-to list for making sweet springtime memories in the kitchen. Easter is a time of joy, color, and creativity—and what better way to celebrate than by baking cookies with your little ones? From pastel-colored frosting to fun bunny shapes and sprinkles galore, these cookies are as fun to make as they are to eat.

Baking with kids isn’t just about the end result—it’s about the giggles, sticky fingers, and shared moments that turn simple recipes into cherished traditions. This list features easy-to-follow recipes that are perfect for tiny hands and growing imaginations. Whether you’re decorating sugar cookies with colorful icing, pressing thumbprints into soft dough, or sandwiching marshmallows between chocolatey bites, every recipe is designed to be stress-free and full of fun.
These Easter cookie ideas range from no-bake treats to classic cut-out cookies, making them ideal for all ages and skill levels. You’ll also find allergy-friendly options and mess-friendly tips to keep things running smoothly—even with a kitchen full of enthusiastic helpers. So roll up your sleeves, grab your cookie cutters, and prepare for a day of baking that’s just as sweet as the cookies themselves.
Coconut Macaroon Nests
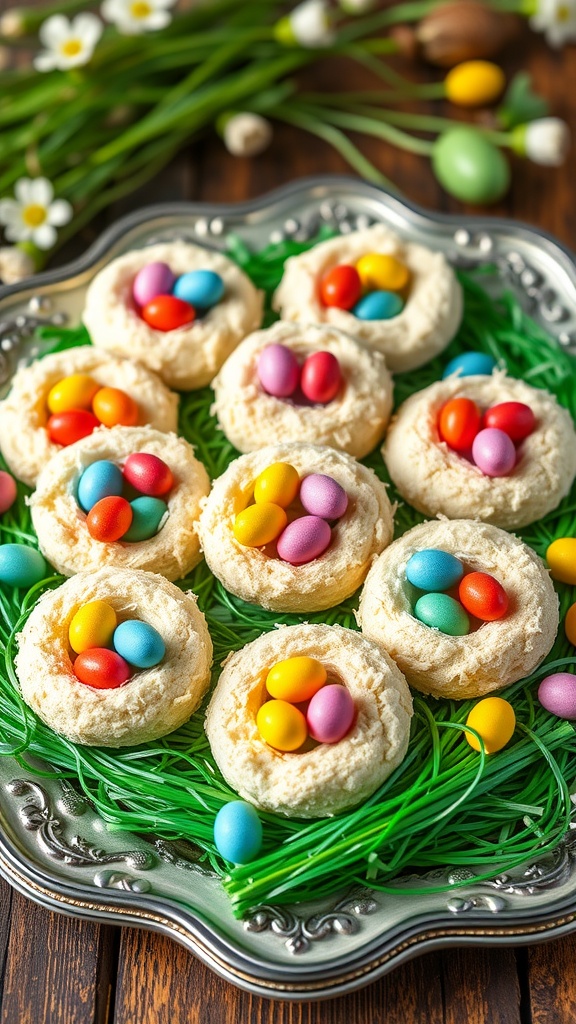
Coconut macaroon nests are a delightful treat that bring a touch of Easter joy to your kitchen. These chewy, coconut-packed cookies are not only delicious but also simple to make, making them a perfect project for kids and parents to tackle together. With a crispy exterior and soft, sweet center, these nests are both fun to create and tasty to eat!
The best part is the colorful candy ‘eggs’ nestled inside each nest, adding a playful touch that kids will love. Get ready to enjoy some family bonding while whipping up these charming sweet bites!
Ingredients
- 3 cups shredded coconut
- 2/3 cup sweetened condensed milk
- 1 teaspoon vanilla extract
- 2 large egg whites
- 1/4 teaspoon salt
- Chocolate or candy eggs for decoration
Instructions
- Preheat your oven to 325°F (160°C) and line a baking sheet with parchment paper.
- In a bowl, mix together the shredded coconut, sweetened condensed milk, and vanilla extract until well combined.
- In a separate bowl, whisk the egg whites and salt until soft peaks form. Gently fold the egg whites into the coconut mixture until just combined.
- Using a spoon or your hands, form small nests on the prepared baking sheet, creating a small indentation in the center of each to hold the candy eggs.
- Bake for 20-25 minutes, or until the edges are golden brown. Allow to cool slightly before placing candy eggs in the center.
Chocolate-Dipped Pretzel Cookies

Chocolate-Dipped Pretzel Cookies are a delightful treat that marries the salty crunch of pretzels with the sweetness of chocolate. This fun recipe is not only simple to make, but it also allows kids to get creative with colorful toppings. The combination of flavors makes each bite both satisfying and exciting.
Baking together will be an enjoyable experience as you melt the chocolate and dip the pretzels. Kids will love adding their favorite sprinkles and candies to these cookies, making them a personalized treat perfect for Easter celebrations.
Ingredients
- 2 cups pretzel twists
- 1 cup semi-sweet chocolate chips
- 1 tablespoon coconut oil (optional, for smooth melting)
- 1/2 cup mini chocolate eggs or other candies
- 1/4 cup colorful sprinkles
Instructions
- Prepare the Chocolate: In a microwave-safe bowl, combine the chocolate chips and coconut oil. Heat in 30-second intervals, stirring in between, until fully melted and smooth.
- Dip the Pretzels: Dip each pretzel twist halfway into the melted chocolate, allowing any excess chocolate to drip off. Place the dipped pretzels on a parchment-lined baking sheet.
- Add Toppings: While the chocolate is still warm, sprinkle mini chocolate eggs and colorful sprinkles on top of the pretzels.
- Chill: Refrigerate the pretzels for about 30 minutes or until the chocolate has completely hardened.
- Enjoy: Once set, serve these deliciously fun treats at your Easter gathering or pack them as a sweet surprise for later!
Carrot Cake Cookies with Cream Cheese Frosting

Carrot cake cookies are a delightful twist on a classic dessert, combining the warm, spiced flavors of carrot cake with the soft, chewy texture of a cookie. With hints of cinnamon and nutmeg, each bite is a treat for the senses. The cream cheese frosting adds a creamy sweetness that perfectly balances the spices, making these cookies a favorite for both kids and adults.
This recipe is simple to make, allowing for fun family time in the kitchen. Kids will love helping to mix the ingredients and decorate the cookies with frosting and cute little carrot toppings. It’s a festive treat that’s perfect for Easter gatherings or any spring celebration!
Ingredients
- 1 cup unsalted butter, softened
- 1 cup brown sugar, packed
- 1/2 cup granulated sugar
- 2 large eggs
- 1 teaspoon vanilla extract
- 2 cups all-purpose flour
- 1 teaspoon baking soda
- 1 teaspoon ground cinnamon
- 1/4 teaspoon ground nutmeg
- 1/2 teaspoon salt
- 2 cups grated carrots
- 1 cup chopped walnuts or pecans (optional)
Instructions
- Preheat the Oven: Preheat your oven to 350°F (175°C) and line a baking sheet with parchment paper.
- Mix the Wet Ingredients: In a large bowl, cream together the softened butter, brown sugar, and granulated sugar until light and fluffy. Beat in the eggs one at a time, then add the vanilla extract.
- Combine the Dry Ingredients: In another bowl, whisk together the flour, baking soda, cinnamon, nutmeg, and salt. Gradually add the dry mixture to the wet ingredients until combined.
- Add Carrots and Nuts: Stir in the grated carrots and nuts, if using, until evenly distributed.
- Scoop and Bake: Drop spoonfuls of dough onto the prepared baking sheet, spacing them about 2 inches apart. Bake for 12-15 minutes, or until the edges are lightly golden.
- Cool and Frost: Allow the cookies to cool on the baking sheet for a few minutes before transferring them to a wire rack to cool completely. Once cooled, frost with cream cheese frosting and top with decorative carrot candies if desired.
Springtime Lemon Zest Cookies

Springtime Lemon Zest Cookies are an easy and fun treat to make with your kids. Bursting with fresh lemon flavor, they offer a delightful balance of sweetness and tanginess that’s perfect for the season. The cookies are soft and chewy, making them a hit with both kids and adults alike.
Not only are these cookies simple to whip up, but they also fill your kitchen with a refreshing citrus scent that instantly brightens the mood. Gather your little helpers and enjoy the process of mixing, rolling, and baking together for a delicious springtime activity!
Ingredients
- 2 1/2 cups all-purpose flour
- 1 teaspoon baking soda
- 1/2 teaspoon salt
- 1 cup unsalted butter, softened
- 1 cup granulated sugar
- 1/2 cup brown sugar, packed
- 2 large eggs
- 1 tablespoon lemon zest
- 1 teaspoon vanilla extract
- 1/4 cup lemon juice
- 1 cup white chocolate chips (optional)
Instructions
- Preheat the oven to 350°F (175°C) and line a baking sheet with parchment paper.
- In a bowl, whisk together flour, baking soda, and salt. Set aside.
- In a large mixing bowl, cream together the softened butter, granulated sugar, and brown sugar until light and fluffy.
- Add the eggs one at a time, mixing well after each addition, then stir in lemon zest, vanilla extract, and lemon juice.
- Gradually mix in the flour mixture until just combined. If using, fold in white chocolate chips.
- Drop spoonfuls of dough onto the prepared baking sheet, spacing them a couple of inches apart.
- Bake for 10-12 minutes or until the edges are lightly golden. Allow to cool on the baking sheet for a few minutes before transferring to a wire rack to cool completely.
Flower Power Shortbread Cookies
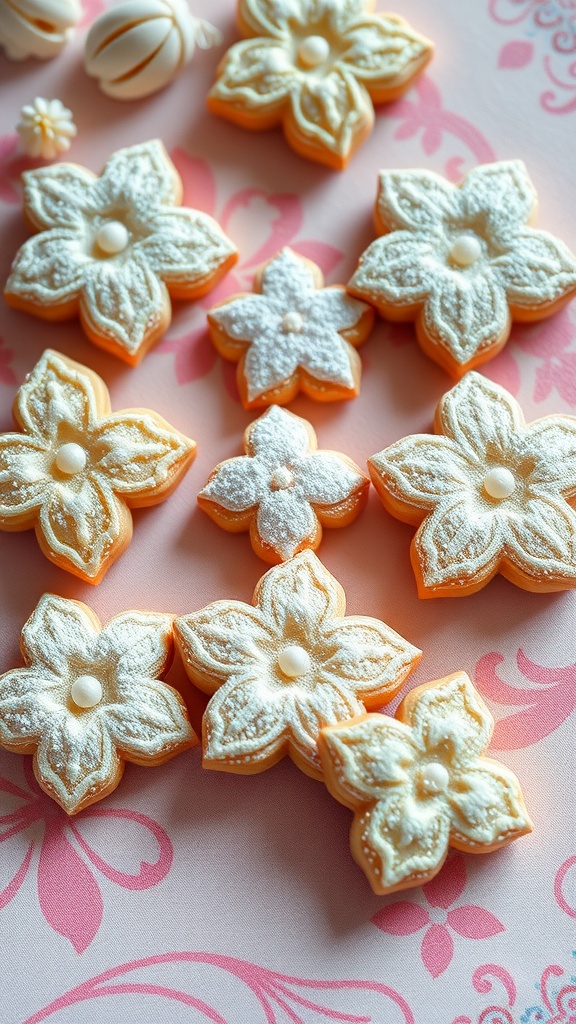
Flower Power Shortbread Cookies are a delightful treat that captures the essence of spring in every bite. With their buttery texture and sweet flavor, these cookies are not only tasty but also simple to make, making them perfect for a fun baking session with the kids.
Decorating these cookies can be a creative adventure, allowing your little ones to add their personal touch with colorful icing and sprinkles. Whether you’re preparing for Easter or just looking for a festive treat, these flower-shaped cookies will bring cheer to any gathering.
Ingredients
- 2 cups all-purpose flour
- 1/2 cup powdered sugar
- 1 cup unsalted butter, softened
- 1 teaspoon vanilla extract
- 1/4 teaspoon salt
- Colored icing for decoration
- Edible glitter or sprinkles (optional)
Instructions
- Make the Dough: In a mixing bowl, cream together the softened butter and powdered sugar until light and fluffy. Add the vanilla extract and salt, mixing to combine. Gradually add in the flour, mixing until a dough forms.
- Chill: Divide the dough in half, wrap each portion in plastic wrap, and refrigerate for about 30 minutes to firm up.
- Shape and Bake: Preheat your oven to 350°F (175°C). Roll out the dough on a lightly floured surface to about 1/4 inch thick. Use a flower-shaped cookie cutter to cut out shapes and place them on a baking sheet lined with parchment paper. Bake for 10-12 minutes or until the edges are lightly golden.
- Cool and Decorate: Allow the cookies to cool completely on a wire rack. Once cooled, decorate with colored icing and add sprinkles or edible glitter for an extra touch.
Peep-Inspired Marshmallow Cookies

Peep-Inspired Marshmallow Cookies are a delightful treat that brings the fun of Easter right into your kitchen. These cookies are soft and chewy, with a sweet marshmallow flavor that pairs perfectly with the colorful candy decorations. Baking these cookies is a simple and enjoyable process, making them a great activity to do with the kids.
The cookies are topped with adorable marshmallow bunny Peeps and colorful candy pieces, adding a festive touch that’s sure to bring smiles. Not only do they taste delicious, but they also make a fun centerpiece for your Easter celebrations.
Ingredients
- 1 cup unsalted butter, softened
- 1 cup granulated sugar
- 1 cup brown sugar, packed
- 2 large eggs
- 1 teaspoon vanilla extract
- 3 cups all-purpose flour
- 1 teaspoon baking soda
- 1/2 teaspoon salt
- 1 cup white chocolate chips
- 1 cup colorful candy pieces (like M&Ms)
- 1 package Peeps marshmallow bunnies
Instructions
- Preheat the oven to 350°F (175°C). Line baking sheets with parchment paper.
- In a large bowl, cream together the softened butter, granulated sugar, and brown sugar until light and fluffy. Add the eggs and vanilla extract, mixing until well combined.
- In another bowl, whisk together the flour, baking soda, and salt. Gradually add the dry ingredients to the wet ingredients, mixing just until combined. Fold in the white chocolate chips and colorful candy pieces.
- Drop rounded tablespoons of dough onto the prepared baking sheets, spacing them about 2 inches apart. Gently press a Peep bunny into the center of each cookie, adding a few extra candy pieces around the edges for decoration.
- Bake for 10-12 minutes, or until the edges are lightly golden. Let the cookies cool on the baking sheets for a few minutes before transferring them to a wire rack to cool completely.
Egg-Cited Chocolate Chip Cookies

These Egg-Cited Chocolate Chip Cookies are a fun twist on the classic treat, perfect for celebrating Easter with kids. Packed with melty chocolate chips and colorful candy-coated chocolates, these cookies are both delicious and visually appealing. They are super simple to make, making them ideal for a family baking session.
The cookies come out soft and chewy, with a delightful crunch from the candies on top. Kids will love participating in the decorating process, making it a memorable activity that brings joy to the kitchen. Your family will be egg-cited to enjoy these festive cookies!
Ingredients
- 1 cup unsalted butter, softened
- 3/4 cup brown sugar, packed
- 1/2 cup granulated sugar
- 1 teaspoon vanilla extract
- 2 large eggs
- 2 1/4 cups all-purpose flour
- 1 teaspoon baking soda
- 1/2 teaspoon salt
- 1 cup chocolate chips
- 1 cup candy-coated chocolates
Instructions
- Preheat the Oven: Start by preheating your oven to 350°F (175°C) and lining a baking sheet with parchment paper.
- Make the Dough: In a large bowl, cream together the softened butter, brown sugar, and granulated sugar until smooth. Beat in the eggs and vanilla extract until well combined.
- Combine the Dry Ingredients: In another bowl, whisk together the flour, baking soda, and salt. Gradually add this mixture to the wet ingredients, stirring until just combined.
- Add the Mix-Ins: Fold in the chocolate chips and half of the candy-coated chocolates, mixing until evenly distributed.
- Scoop and Bake: Drop spoonfuls of dough onto the prepared baking sheet, spacing them about 2 inches apart. Press a few of the remaining candy-coated chocolates on top of each cookie. Bake for 10-12 minutes, or until the edges are lightly golden.
- Cool and Enjoy: Allow the cookies to cool on the baking sheet for a few minutes before transferring them to a wire rack to cool completely. Enjoy your Egg-Cited Chocolate Chip Cookies!
Bunny-Shaped Sugar Cookies

Bunny-shaped sugar cookies are a delightful treat that brings a touch of whimsy to any Easter celebration. These cookies are soft and buttery, with a hint of sweetness that makes them perfect for kids and adults alike. Plus, they are simple to make, making them a fun family activity to enjoy together.
Decorating these bunny cookies is the best part! You can get creative with colorful icing and sprinkles, letting kids express their artistic side. Whether you’re making them for an Easter party or just for fun, these cookies are sure to bring smiles all around.
Ingredients
- 2 ¾ cups all-purpose flour
- 1 teaspoon baking powder
- ½ teaspoon salt
- 1 cup unsalted butter, softened
- 1 ½ cups granulated sugar
- 1 large egg
- 1 teaspoon vanilla extract
- 1 teaspoon almond extract
- Royal icing for decoration
- Food coloring and sprinkles (optional)
Instructions
- Create the Dough: In a bowl, mix flour, baking powder, and salt. In another bowl, cream together the softened butter and sugar until light and fluffy. Add the egg and extracts, mixing well. Gradually add the dry ingredients to the wet ingredients until a dough forms.
- Chill the Dough: Wrap the dough in plastic wrap and refrigerate for at least 1 hour. This helps the cookies maintain their shape when baked.
- Shape and Bake: Preheat your oven to 350°F (175°C). Roll out the dough on a floured surface to about ¼ inch thick. Use a bunny-shaped cookie cutter to cut out cookies and place them on a baking sheet lined with parchment paper. Bake for 8-10 minutes, or until the edges are lightly golden.
- Cool and Decorate: Allow the cookies to cool completely. Once cooled, use royal icing to decorate your bunnies. Get creative with colors and add sprinkles for extra fun!
Marbled Sugar Cookies

Marbled sugar cookies are a delightful treat that kids will love to help make! These cookies are not only fun to create with their colorful swirls, but they also offer a sweet, buttery flavor that melts in your mouth. The simple dough comes together quickly, making it a perfect baking project for families during the Easter season.
With just a few ingredients and easy steps, you can whip up a batch of these pretty cookies. The marbled effect adds a creative twist that will impress everyone at your Easter gathering. Plus, it’s a great way for kids to practice their baking skills while having a blast!
Ingredients
- 2 ¾ cups all-purpose flour
- 1 teaspoon baking powder
- ½ teaspoon salt
- 1 cup unsalted butter, softened
- 1 ½ cups granulated sugar
- 1 large egg
- 1 teaspoon vanilla extract
- Food coloring (pink, blue, or any colors of your choice)
Instructions
- Preheat the oven to 350°F (175°C). Line a baking sheet with parchment paper.
- In a bowl, whisk together flour, baking powder, and salt. Set aside.
- In a separate bowl, cream the softened butter and sugar until light and fluffy. Add the egg and vanilla extract, mixing until well combined.
- Gradually add the dry ingredients to the wet mixture, mixing until a dough forms.
- Divide the dough into portions and add a few drops of food coloring to each. Knead gently to create a marbled effect.
- Pinch off small pieces of each colored dough and roll them together into a ball. Place on the prepared baking sheet, flattening slightly.
- Bake for 10-12 minutes, or until the edges are lightly golden. Let cool on the baking sheet for a few minutes before transferring to a wire rack.
Rainbow Sprinkle Butter Cookies

Rainbow Sprinkle Butter Cookies are a delightful treat that brings a burst of color and sweetness to any occasion. These cookies are soft, buttery, and filled with fun sprinkles, making them perfect for kids to enjoy. Simple to make, the recipe requires just a few basic ingredients, allowing little bakers to get involved without feeling overwhelmed.
The cookies have a lovely buttery flavor and are sprinkled with colorful bits that add a playful touch. They are great for Easter celebrations, playdates, or any time you want to bake something cheerful. Plus, the dough comes together quickly, so you can whip them up in no time!
Ingredients
- 1 cup unsalted butter, softened
- 3/4 cup granulated sugar
- 1 large egg
- 1 teaspoon vanilla extract
- 2 1/4 cups all-purpose flour
- 1/2 teaspoon baking powder
- 1/4 teaspoon salt
- 1/2 cup rainbow sprinkles
Instructions
- Preheat the oven to 350°F (175°C) and line a baking sheet with parchment paper.
- In a large bowl, cream together the softened butter and sugar until light and fluffy. Beat in the egg and vanilla extract.
- In another bowl, whisk together the flour, baking powder, and salt. Gradually add this dry mixture to the wet ingredients, mixing until just combined.
- Fold in the rainbow sprinkles gently, being careful not to overmix.
- Drop tablespoon-sized balls of dough onto the prepared baking sheet, leaving space between each cookie.
- Bake for 10-12 minutes, or until the edges are slightly golden. Let cool on the baking sheet for a few minutes before transferring to a wire rack to cool completely.
Vanilla Bean Easter Egg Cookies
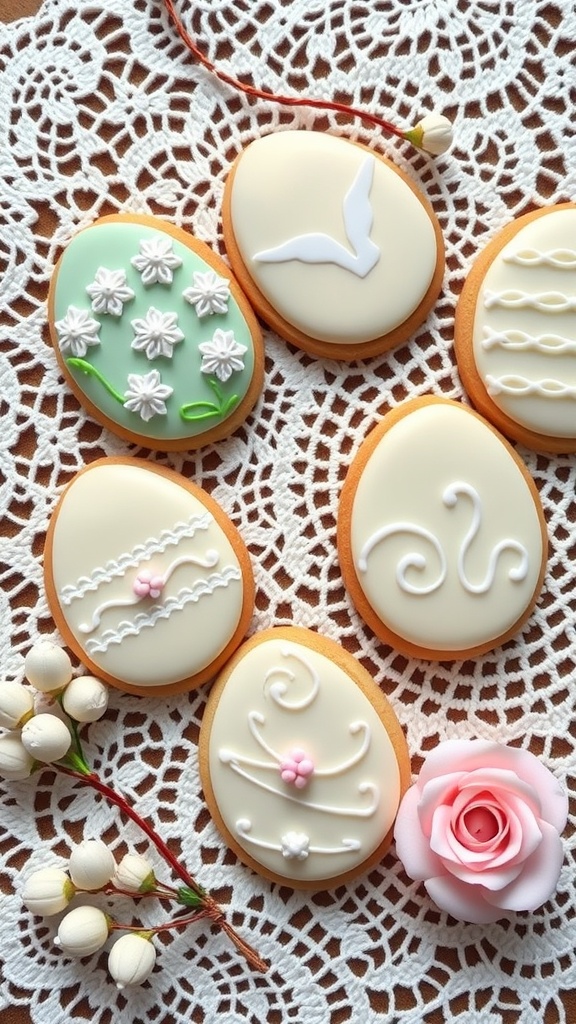
Vanilla Bean Easter Egg Cookies are a delightful treat that’s perfect for celebrating the holiday with your little ones. These cookies are soft, buttery, and infused with the rich flavor of vanilla bean, making them a delicious canvas for fun designs. The process is simple enough for kids to help out, making it a great way to spend time together in the kitchen.
Decorating these cookies is where the real fun begins! You can use colorful icing and sprinkles to create beautiful Easter designs. Let your kids unleash their creativity as they make each cookie unique. With just a few ingredients, these cookies are not only tasty but also a joy to make!
Ingredients
- 2 3/4 cups all-purpose flour
- 1 teaspoon baking powder
- 1/2 teaspoon salt
- 1 cup unsalted butter, softened
- 1 cup granulated sugar
- 1 large egg
- 1 tablespoon vanilla bean paste
- 1 teaspoon vanilla extract
- Royal icing for decoration
Instructions
- Preheat the oven to 350°F (175°C) and line baking sheets with parchment paper.
- In a bowl, whisk together flour, baking powder, and salt. Set aside.
- In another bowl, cream together the softened butter and granulated sugar until light and fluffy.
- Add the egg, vanilla bean paste, and vanilla extract, mixing until well combined.
- Gradually add the dry ingredients to the butter mixture, mixing until a dough forms.
- Roll the dough out on a floured surface to about 1/4 inch thick. Use an egg-shaped cookie cutter to cut out cookies and place them on the prepared baking sheets.
- Bake for 10-12 minutes or until the edges are lightly golden. Let them cool completely before decorating.
- Once cooled, use royal icing to decorate the cookies with fun Easter designs.
Final Thoughts
Baking Easter cookies with kids is about more than just creating something tasty—it’s about spending quality time together and sparking creativity. These 11 kid-friendly Easter cookie recipes make it easy to turn a simple afternoon into a delightful tradition that your family will look forward to every year.
From chocolate-covered treats to colorful sugar cookies, there’s a recipe here for every taste and age. So whether you’re filling an Easter basket or just making a mess (and memories) in the kitchen, these fun and festive cookie ideas are sure to bring smiles all around.
Happy baking and happy Easter!