12 Bright & Beautiful Spring Desserts to Welcome the Season is your go-to collection for sweet treats that celebrate everything we love about spring—fresh flavors, vibrant colors, and a sense of renewal. As the days grow warmer and flowers begin to bloom, it’s the perfect time to refresh your dessert table with light, cheerful recipes that capture the essence of the season.

From luscious lemon bars to strawberry shortcake, delicate floral cupcakes to berry-packed trifles, these desserts are as stunning to look at as they are delicious to eat. Whether you’re planning an Easter brunch, a garden party, or simply want to enjoy a slice of something sweet on a sunny afternoon, you’ll find a variety of options to suit every taste and occasion.
These spring-inspired desserts not only highlight seasonal fruits like strawberries, blueberries, rhubarb, and citrus, but they also bring a splash of color and joy to any table. Many of the recipes are easy to make, yet impressive enough to serve at special gatherings. They’re the kind of treats that bring smiles, spark conversation, and leave your guests reaching for seconds.
So open your windows, let the fresh air in, and get ready to bake your way into spring with this delightful roundup of desserts that are as joyful and refreshing as the season itself.
Coconut Macaroon Nests with Chocolate Eggs
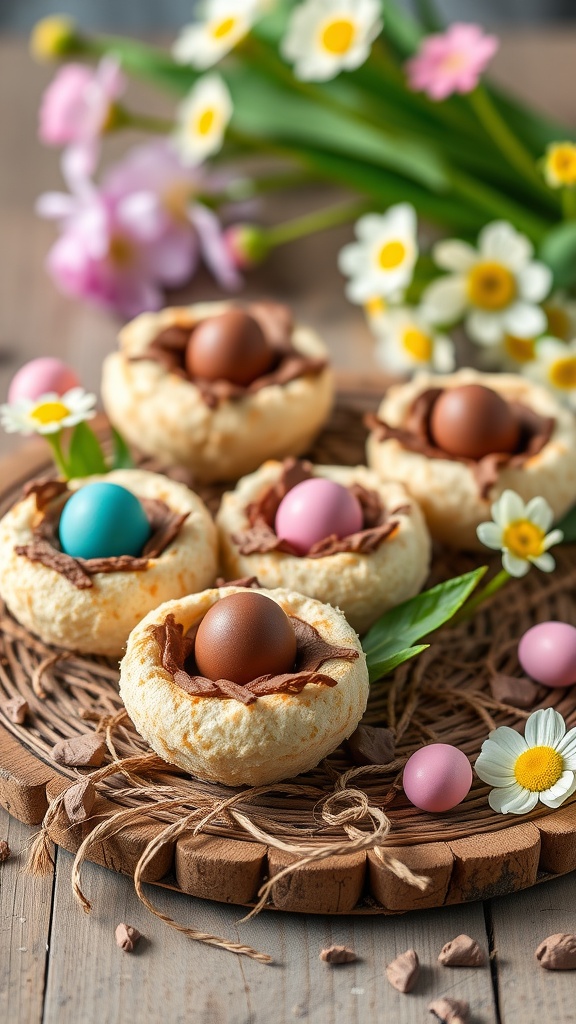
Coconut Macaroon Nests are a delightful and playful dessert that’s perfect for spring. Made from sweetened shredded coconut and egg whites, these little nests have a chewy texture and a rich coconut flavor that feels like a treat. Nestled inside are colorful chocolate eggs, making them festive and fun for any occasion.
This recipe is simple to whip up, making it a great choice for baking with kids or for a last-minute dessert. With just a few ingredients, you can create these charming nests that are sure to bring a smile to everyone’s face!
Ingredients
- 2 ¾ cups sweetened shredded coconut
- 2 large egg whites
- ½ cup granulated sugar
- 1 teaspoon vanilla extract
- ½ teaspoon almond extract
- Chocolate eggs (for filling)
Instructions
- Preheat your oven to 325°F (160°C). Line a baking sheet with parchment paper.
- In a large bowl, combine the shredded coconut, egg whites, sugar, vanilla, and almond extract. Mix until well combined.
- Using your hands, shape the coconut mixture into small nests on the prepared baking sheet. Make an indentation in the center of each nest for the chocolate eggs.
- Bake for 20-25 minutes, or until the edges are golden brown. Remove from the oven and let cool completely on the baking sheet.
- Once cooled, place chocolate eggs in the center of each nest. Serve and enjoy your delightful Coconut Macaroon Nests!
Mango Mousse with Passionfruit Sauce
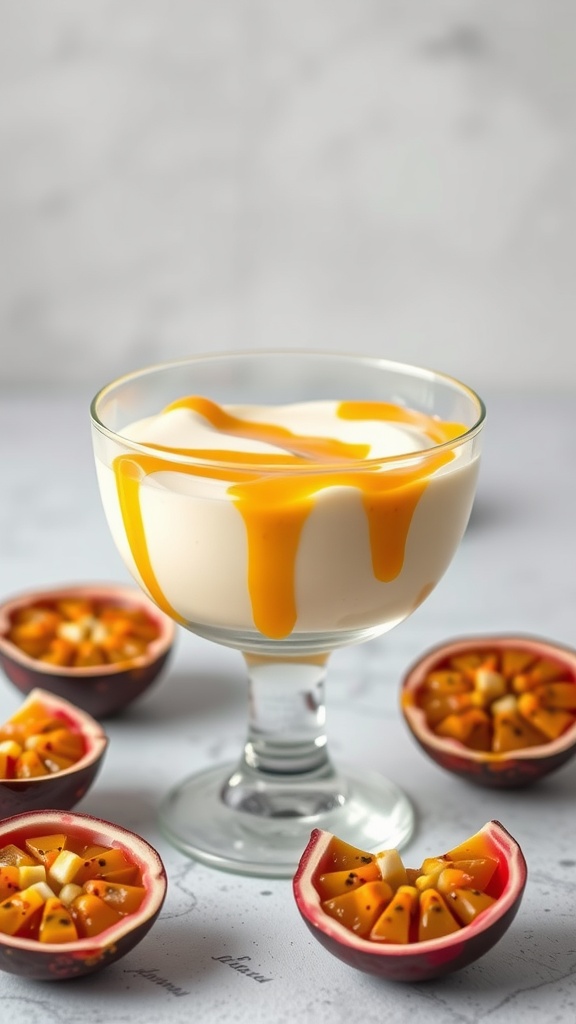
Mango mousse is a delightful dessert that perfectly captures the essence of spring with its light and airy texture. The tropical sweetness of ripe mangoes pairs beautifully with a zesty passionfruit sauce, creating a refreshing treat that is both satisfying and uplifting. This recipe is simple and quick to prepare, making it ideal for gatherings or a special family dessert.
The creamy mango mousse is not only visually appealing but also incredibly tasty, offering a burst of fruity flavor in every spoonful. The tangy passionfruit sauce adds a vibrant contrast, enhancing the overall flavor profile. Whether you’re enjoying it on a sunny afternoon or serving it at a dinner party, this dessert is sure to impress!
Ingredients
- 2 ripe mangoes, peeled and diced
- 1 cup heavy cream
- 1/2 cup sugar
- 1 teaspoon vanilla extract
- 2 tablespoons gelatin powder
- 1/4 cup water
- 1/2 cup passionfruit pulp (fresh or canned)
- 1 tablespoon lime juice
- Mint leaves for garnish (optional)
Instructions
- Prepare the Gelatin: In a small bowl, sprinkle the gelatin over the water and let it bloom for about 5 minutes. Then, gently heat it until fully dissolved, and set aside.
- Make the Mango Puree: In a blender, combine the diced mangoes, sugar, and vanilla extract. Blend until smooth.
- Whip the Cream: In a separate bowl, whip the heavy cream until soft peaks form. Gently fold in the mango puree and the dissolved gelatin until well combined.
- Chill the Mousse: Spoon the mixture into serving dishes and refrigerate for at least 2-3 hours until set.
- Prepare the Passionfruit Sauce: In a small bowl, mix the passionfruit pulp with lime juice. Stir gently and refrigerate until ready to serve.
- Serve: Once the mousse is set, top it with the passionfruit sauce and garnish with mint leaves if desired. Enjoy your refreshing mango mousse with a zesty twist!
Carrot Cake Cupcakes with Cream Cheese Frosting

These carrot cake cupcakes are a delightful treat, combining the warmth of spices with the natural sweetness of carrots. Topped with a luscious cream cheese frosting, they offer a perfect balance of flavors that feels both festive and comforting. Baking these cupcakes is simple, making them a great choice for spring gatherings, birthdays, or just because!
The texture is moist and fluffy, with a hint of nuttiness from the carrots, and the cream cheese frosting adds a rich, tangy sweetness. Whether you’re a baking novice or a seasoned pro, these cupcakes are easy to whip up and are sure to brighten anyone’s day.
Ingredients
- 1 cup all-purpose flour
- 1 teaspoon baking powder
- 1/2 teaspoon baking soda
- 1/2 teaspoon salt
- 1 teaspoon ground cinnamon
- 1/2 teaspoon ground nutmeg
- 1/2 cup granulated sugar
- 1/2 cup brown sugar, packed
- 1/2 cup vegetable oil
- 2 large eggs
- 1 cup grated carrots
- 1/2 cup crushed pineapple, drained
- 1/2 cup chopped walnuts (optional)
- 1 cup cream cheese, softened
- 2 cups powdered sugar
- 1 teaspoon vanilla extract
Instructions
- Preheat the oven to 350°F (175°C) and line a muffin tin with cupcake liners.
- In a bowl, whisk together flour, baking powder, baking soda, salt, cinnamon, and nutmeg.
- In another bowl, mix granulated sugar, brown sugar, and oil until well combined. Add eggs one at a time, mixing well after each addition.
- Gradually add the dry ingredients to the wet ingredients, stirring until just combined. Fold in grated carrots, crushed pineapple, and walnuts if using.
- Pour the batter into the prepared cupcake liners, filling each about 2/3 full. Bake for 18-20 minutes or until a toothpick inserted in the center comes out clean.
- Let the cupcakes cool completely before frosting. For the frosting, beat cream cheese, powdered sugar, and vanilla until smooth and creamy. Spread or pipe onto cooled cupcakes.
Strawberry Shortcake Parfaits
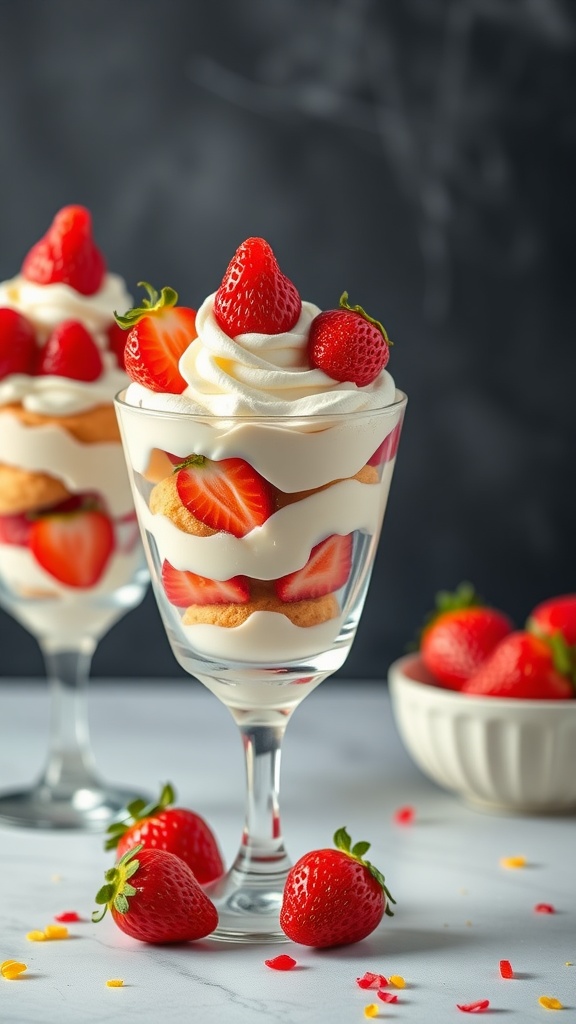
Strawberry Shortcake Parfaits are a delightful way to celebrate the arrival of spring. These desserts bring together layers of fluffy whipped cream, sweet strawberries, and buttery shortcake for a treat that’s both visually appealing and delicious. The combination of creamy and fruity flavors creates a light and refreshing dessert that’s perfect for any occasion.
What makes these parfaits even better is how simple they are to prepare. With just a few ingredients, you can whip up a batch in no time, making them an excellent choice for last-minute gatherings or a fun family dessert. Enjoy the bright flavors of spring with these easy-to-make Strawberry Shortcake Parfaits!
Ingredients
- 2 cups fresh strawberries, sliced
- 1 cup heavy whipping cream
- 1/4 cup powdered sugar
- 1 teaspoon vanilla extract
- 8-10 shortcake biscuits or ladyfingers
- Mint leaves for garnish (optional)
Instructions
- Prepare the Strawberries: In a bowl, combine the sliced strawberries with a tablespoon of sugar (optional) and set aside to macerate for about 10 minutes.
- Make the Whipped Cream: In a chilled bowl, beat the heavy whipping cream with powdered sugar and vanilla extract until soft peaks form.
- Assemble the Parfaits: In clear glasses, layer the shortcake biscuits or ladyfingers, followed by a layer of whipped cream and a layer of macerated strawberries. Repeat the layers until the glasses are full.
- Garnish: Top with additional whipped cream, a few strawberry slices, and mint leaves if desired.
- Serve: Enjoy immediately or refrigerate for up to an hour before serving.
Charming Cherry Blossom Tarts
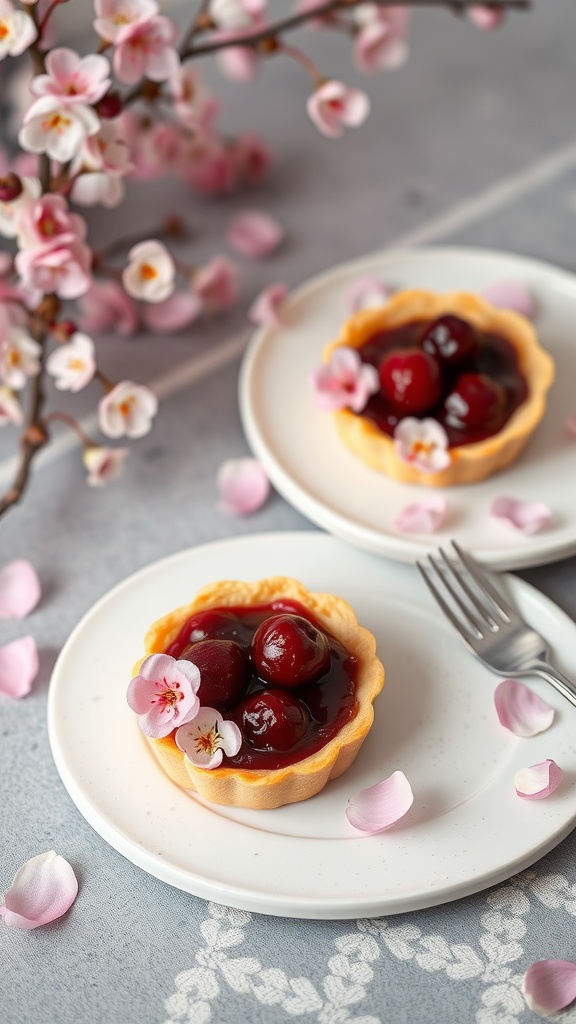
Cherry Blossom Tarts are delightful little desserts that capture the essence of spring. With a buttery tart shell filled with a silky cherry filling and topped with delicate cherry blossoms, these tarts are as much a feast for the eyes as they are for the palate. The sweet and slightly tangy flavor of the cherries pairs perfectly with the rich crust, making each bite a tasty celebration of the season.
Not only are these tarts delicious, but they are also simple to make. Whether you’re hosting a spring gathering or just looking for a sweet treat to brighten your day, these tarts will impress your guests and satisfy your sweet tooth.
Ingredients
- 1 1/2 cups all-purpose flour
- 1/4 cup powdered sugar
- 1/2 cup unsalted butter, softened
- 1 large egg yolk
- 1/4 teaspoon salt
- 1 cup cherry pie filling
- Edible cherry blossoms for garnish
Instructions
- Make the Dough: In a mixing bowl, combine flour, powdered sugar, and salt. Add the softened butter and egg yolk, mixing until the dough forms. If it’s too crumbly, add a teaspoon of cold water.
- Chill the Dough: Wrap the dough in plastic wrap and refrigerate for about 30 minutes. This will help it firm up for easier handling.
- Prepare the Tarts: Preheat your oven to 350°F (175°C). Roll out the chilled dough on a floured surface and cut out circles to fit your tart pans. Press the dough into the pans and trim any excess.
- Bake the Shells: Bake the tart shells for about 15-18 minutes until golden. Allow them to cool completely before filling.
- Fill with Cherry: Spoon the cherry pie filling into each cooled tart shell, spreading it evenly.
- Garnish: Top each tart with edible cherry blossoms for a beautiful spring touch.
Lemon Blueberry Layer Cake
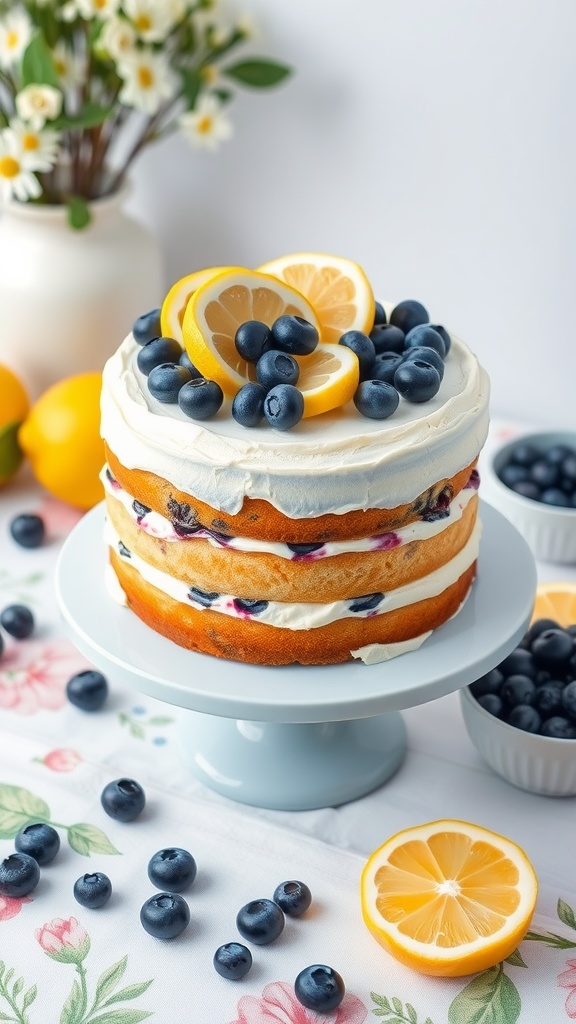
This Lemon Blueberry Layer Cake is a delightful way to welcome the spring season. With its bright lemon flavor paired with fresh blueberries, it’s a refreshing dessert that feels light and vibrant. The fluffy layers of cake, creamy frosting, and bursts of fruit make every bite satisfying yet refreshing.
Making this cake is quite simple, even for those who may not be baking experts. It involves basic cake-making techniques and can be decorated easily with fresh fruit on top. Whether for a spring gathering or just a sweet treat at home, this cake is bound to bring some sunshine to your day!
Ingredients
- 2 cups all-purpose flour
- 1 ½ cups granulated sugar
- 1 tablespoon baking powder
- ½ teaspoon salt
- ½ cup unsalted butter, softened
- 1 cup milk
- 3 large eggs
- 1 tablespoon lemon zest
- ¼ cup fresh lemon juice
- 1 cup blueberries (fresh or frozen)
- 2 cups heavy cream
- ½ cup powdered sugar
- 1 teaspoon vanilla extract
- Extra blueberries and lemon slices for decoration
Instructions
- Preheat the oven to 350°F (175°C). Grease and flour three 8-inch round cake pans.
- In a large bowl, mix together flour, sugar, baking powder, and salt. Add softened butter, milk, eggs, lemon zest, and lemon juice. Beat on medium speed until smooth.
- Gently fold in the blueberries. Divide the batter evenly among the three prepared pans.
- Bake for 25-30 minutes, or until a toothpick inserted in the center comes out clean. Let the cakes cool in the pans for 10 minutes before transferring them to wire racks to cool completely.
- For the frosting, whip the heavy cream with powdered sugar and vanilla extract until soft peaks form.
- To assemble, place one layer of cake on a serving plate, spread a layer of whipped cream, and top with a few blueberries. Repeat with the second layer, then top with the final layer of cake and frost the top and sides with the remaining whipped cream.
- Decorate with additional blueberries and lemon slices. Serve chilled and enjoy your refreshing treat!
Peach Galette with Vanilla Ice Cream
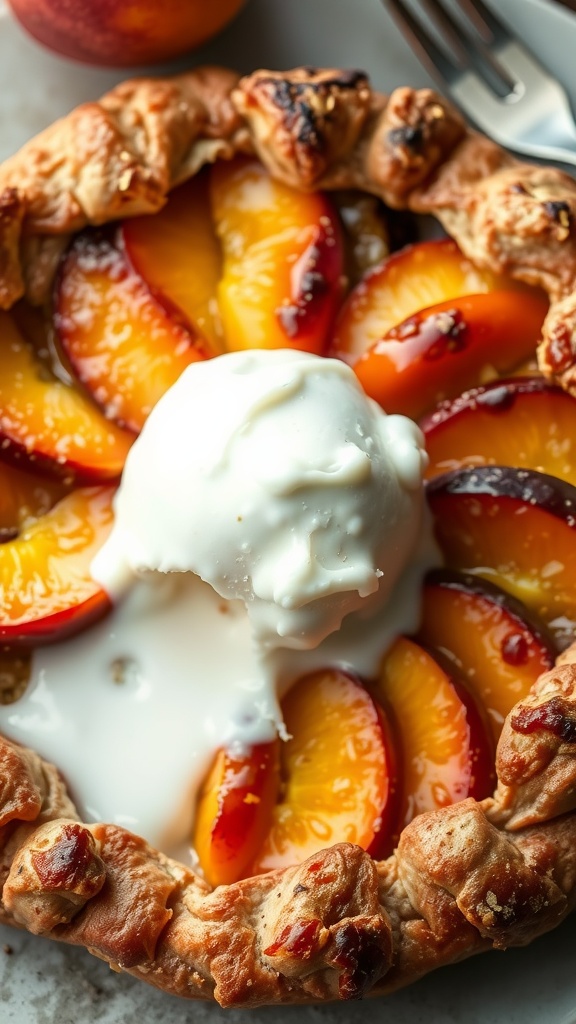
Spring is the season for fresh fruits, and a peach galette is a delightful way to celebrate this vibrant time of year. This rustic dessert combines juicy peaches with a flaky crust, making it both simple to prepare and deliciously satisfying. The sweetness of the peaches pairs wonderfully with a scoop of vanilla ice cream, creating a comforting and seasonal treat.
What’s great about a galette is its laid-back nature. Unlike traditional pies that require crimping and precision, a galette allows for a more casual approach—just fold the edges over the filling and let it bake into a golden brown. The result is a dessert that looks stunning yet feels effortless to make, perfect for any spring gathering.
Ingredients
- 1 refrigerated pie crust
- 3-4 ripe peaches, sliced
- 1/4 cup granulated sugar
- 1 tablespoon cornstarch
- 1 teaspoon vanilla extract
- 1 teaspoon lemon juice
- 1 egg (for egg wash)
- 1 tablespoon coarse sugar (for sprinkling)
- Vanilla ice cream (for serving)
Instructions
- Preheat your oven to 400°F (200°C).
- Roll out the pie crust on a baking sheet lined with parchment paper.
- In a mixing bowl, combine sliced peaches, granulated sugar, cornstarch, vanilla extract, and lemon juice. Toss until the peaches are coated.
- Arrange the peach mixture in the center of the pie crust, leaving about 1-2 inches of space around the edges.
- Fold the edges of the crust over the peaches, creating pleats as you go. Brush the crust with beaten egg and sprinkle coarse sugar on top.
- Bake for 25-30 minutes, or until the crust is golden and the peaches are bubbling.
- Allow to cool slightly before serving with a scoop of vanilla ice cream on top.
Raspberry Lemonade Sorbet
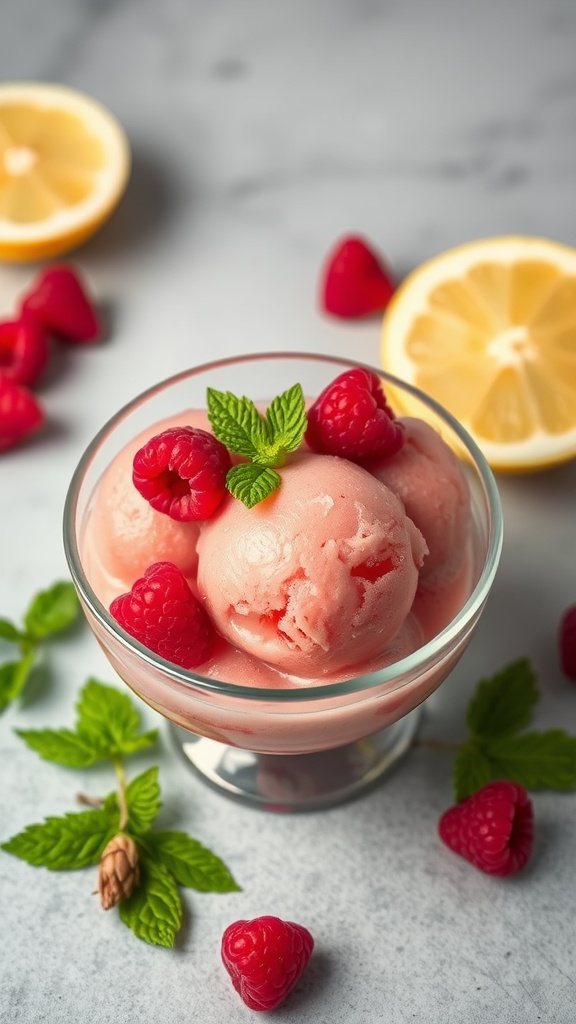
Raspberry Lemonade Sorbet is a refreshing treat that perfectly captures the essence of spring. With its bright, tangy flavor and a hint of sweetness, it’s a delightful way to cool down as the weather warms up. Plus, it’s super easy to make, requiring just a handful of ingredients and minimal effort.
This sorbet is not only a tasty dessert but also a beautiful addition to any spring gathering. The vibrant color of the raspberries combined with the zesty lemon creates an eye-catching presentation that will impress your guests. Whether enjoyed on its own or served alongside a slice of cake, this sorbet is a delightful way to celebrate the season!
Ingredients
- 2 cups fresh raspberries
- 1 cup granulated sugar
- 1 cup water
- 1/2 cup freshly squeezed lemon juice
- 1 teaspoon lemon zest
Instructions
- Prepare the Syrup: In a small saucepan, combine the sugar and water. Heat over medium heat, stirring until the sugar dissolves completely. Remove from heat and let it cool.
- Puree the Raspberries: In a blender, combine the raspberries, cooled syrup, lemon juice, and lemon zest. Blend until smooth. If desired, strain the mixture through a fine mesh sieve to remove the seeds.
- Chill the Mixture: Pour the raspberry mixture into a shallow dish and place it in the freezer. Stir every 30 minutes for about 2-3 hours, or until it is fully frozen and has a fluffy texture.
- Serve: Scoop the sorbet into bowls and garnish with fresh raspberries or mint leaves if desired. Enjoy the refreshing taste of spring!
Lavender Honey Panna Cotta
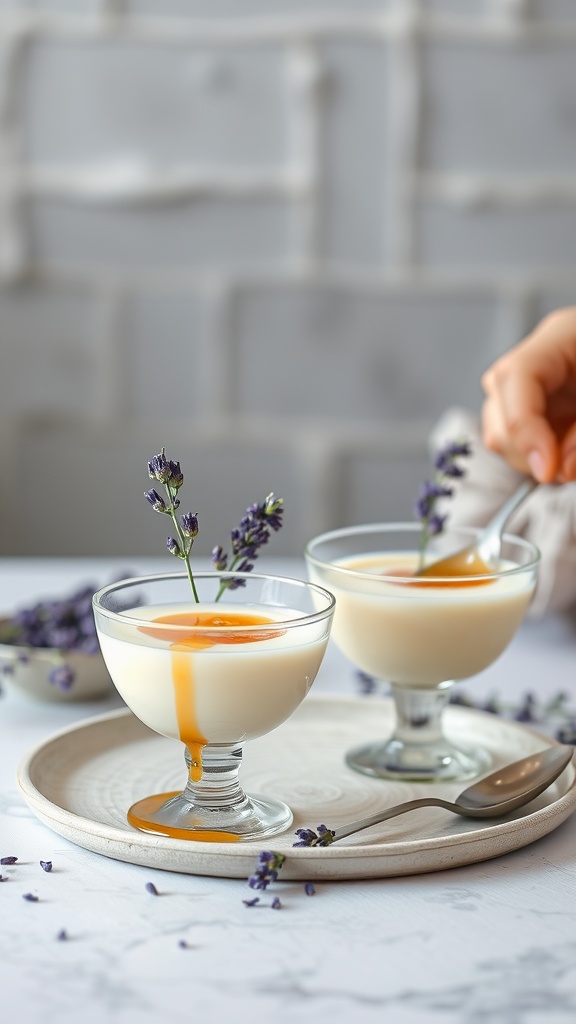
Lavender Honey Panna Cotta is a delightful spring dessert that captures the essence of the season. With its creamy texture and floral notes, this panna cotta offers a refreshing twist on a classic Italian treat. The subtle sweetness from honey paired with the aromatic lavender creates a unique flavor profile that feels both sophisticated and comforting.
This recipe is straightforward, making it perfect for both novice and experienced bakers. With just a few ingredients and minimal effort, you can create an elegant dessert that will impress your guests and delight your taste buds.
Ingredients
- 1 cup heavy cream
- 1 cup whole milk
- 1/4 cup honey
- 1 tablespoon dried culinary lavender
- 2 1/2 teaspoons gelatin powder
- 1 teaspoon vanilla extract
- Pinch of salt
Instructions
- Infuse the Cream: In a saucepan, combine heavy cream, whole milk, honey, lavender, and a pinch of salt. Heat over medium heat until just simmering, then remove from heat and let steep for about 15 minutes.
- Prepare the Gelatin: In a small bowl, sprinkle gelatin over 2 tablespoons of cold water and let it sit for about 5 minutes until it blooms.
- Combine Mixtures: Strain the infused cream mixture to remove lavender buds. Return it to the saucepan over low heat. Stir in the bloomed gelatin and vanilla extract until fully dissolved.
- Chill: Pour the mixture into individual serving cups or ramekins and refrigerate for at least 4 hours or until set.
- Serve: Once set, gently run a knife around the edges of the panna cotta, if needed, and invert onto a plate or serve directly in the cups. Drizzle with additional honey and garnish with fresh lavender, if desired.
Mint Chocolate Chip Ice Cream Sundae

When spring arrives, there’s nothing quite like indulging in a Mint Chocolate Chip Ice Cream Sundae. The refreshing taste of mint combined with rich chocolate chips creates a delightful treat that’s perfect for warm days. This dessert is not only delicious but also super easy to whip up, making it a go-to choice for gatherings or a cozy night in.
Topped with fluffy whipped cream, a drizzle of chocolate syrup, and a cherry on top, this sundae is as pleasing to the eyes as it is to the taste buds. Whether you’re entertaining guests or treating yourself, this sundae is a simple yet elegant way to celebrate the season.
Ingredients
- 4 cups mint chocolate chip ice cream
- 1 cup whipped cream
- 1/4 cup chocolate syrup
- 1/4 cup mini chocolate chips
- 2 cherries for topping
Instructions
- In a tall glass or sundae dish, scoop in the mint chocolate chip ice cream.
- Add a generous layer of whipped cream on top of the ice cream.
- Drizzle chocolate syrup over the whipped cream.
- Sprinkle mini chocolate chips on top for extra crunch.
- Finish with a cherry or two on top and enjoy your delightful sundae!
Banana Cream Pie with Whipped Topping
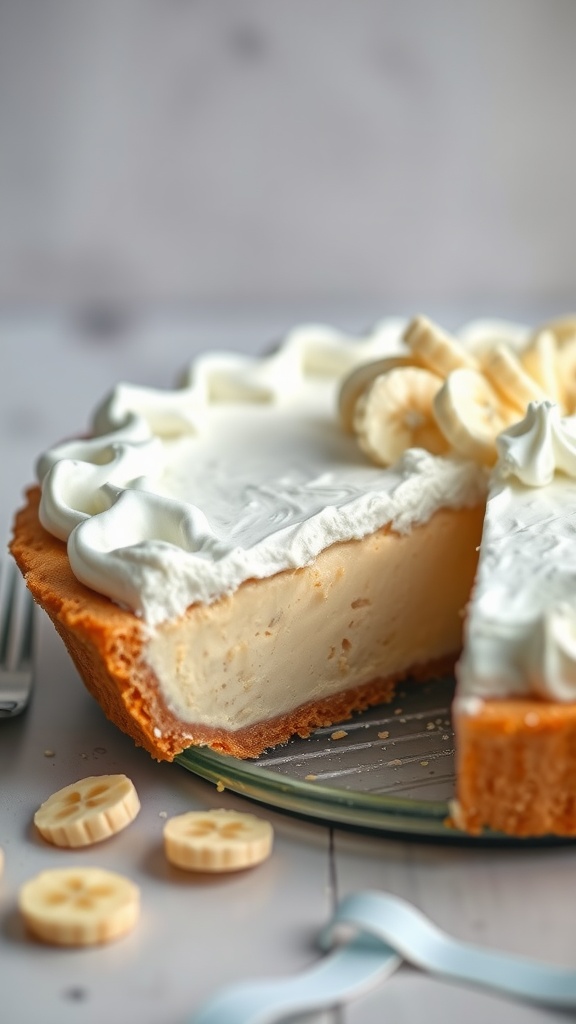
Banana Cream Pie is a delightful dessert that celebrates the sweetness of ripe bananas and smooth, creamy filling. The rich flavor combined with a buttery crust makes this pie a springtime favorite. With a light whipped topping that adds a touch of elegance, it’s both tasty and simple to whip up, making it perfect for any gathering.
Not only is this pie easy to make, but it also brings a burst of joy to your table. Whether you’re enjoying a sunny afternoon or celebrating a special occasion, this Banana Cream Pie is sure to leave everyone smiling!
Ingredients
- 1 pre-made graham cracker crust
- 3 ripe bananas, sliced
- 2 cups milk
- 1/2 cup granulated sugar
- 1/3 cup cornstarch
- 1/4 teaspoon salt
- 3 large egg yolks
- 2 tablespoons unsalted butter
- 1 teaspoon vanilla extract
- 2 cups heavy whipping cream
- 1/4 cup powdered sugar
Instructions
- Prepare the Filling: In a medium saucepan, whisk together the milk, sugar, cornstarch, and salt. Cook over medium heat, stirring frequently until it thickens. Remove from heat.
- In a bowl, beat the egg yolks. Gradually add a small amount of the hot mixture to temper the eggs, then return it all to the saucepan. Cook for an additional 2 minutes, then stir in the butter and vanilla until smooth.
- Layer Bananas: Place half of the sliced bananas at the bottom of the graham cracker crust. Pour half of the filling over the bananas, then repeat with the remaining bananas and filling. Chill in the refrigerator for at least 4 hours.
- Make the Whipped Topping: In a mixing bowl, whip the heavy cream until soft peaks form. Gradually add powdered sugar, continuing to whip until stiff peaks form.
- Serve: Spread the whipped cream over the top of the chilled pie. Slice and enjoy!
Chocolate Covered Strawberry Skewers

Chocolate covered strawberry skewers are a delightful way to celebrate the flavors of spring. Juicy strawberries coated in rich chocolate are not only a treat for the taste buds but also a feast for the eyes. These skewers are simple to make, making them perfect for gatherings or a sweet treat at home.
With just a few ingredients and minimal fuss, you can create a colorful and tasty dessert that everyone will love. The combination of fresh fruit and smooth chocolate is always a hit, and the presentation on skewers adds a fun twist. These treats are sure to brighten up any occasion!
Ingredients
- 1 pound fresh strawberries
- 8 ounces dark chocolate, chopped
- 4 ounces white chocolate, chopped
- Skewers or lollipop sticks
- Optional: sprinkles or chopped nuts for decoration
Instructions
- Prepare the Strawberries: Rinse the strawberries under cold water and gently pat them dry with a paper towel. Ensure they are completely dry for the chocolate to adhere properly.
- Melt the Dark Chocolate: In a microwave-safe bowl, melt the dark chocolate in 30-second intervals, stirring in between until smooth.
- Dip the Strawberries: Carefully dip each strawberry into the melted dark chocolate, allowing any excess chocolate to drip off. Place them on a parchment-lined tray.
- Prepare the White Chocolate: Melt the white chocolate in a similar manner, then use a fork to drizzle it over the dark chocolate-covered strawberries for a decorative touch.
- Add Decorations: If desired, sprinkle some toppings like sprinkles or nuts while the chocolate is still wet.
- Chill: Place the tray in the refrigerator for about 30 minutes, or until the chocolate is set.
- Assemble on Skewers: Once set, thread the strawberries onto skewers for easy serving. Enjoy your delicious chocolate covered strawberry skewers!
Final Thoughts
Spring is a time of brightness, beauty, and beginnings—and what better way to celebrate than with a table full of delicious desserts that reflect the season’s charm? These 12 sweet creations offer a little something for everyone, from fruit-lovers to chocolate fans, and from casual bakers to dessert enthusiasts.
Whether you’re hosting a celebration or treating yourself to a sunny afternoon indulgence, these desserts will help you savor the sweet side of spring. So gather your ingredients, embrace the flavors of the season, and enjoy every bite of these bright and beautiful creations. Happy Spring!