Easter is the perfect time to gather with loved ones, celebrate new beginnings, and enjoy sweet, colorful treats that capture the joy of the season. 12 fun Easter desserts that’ll make everyone smile are more than just festive—they’re bursting with charm, flavor, and creativity. Whether you’re hosting a big family brunch, organizing an Easter egg hunt, or simply looking to sweeten your spring day, these desserts will add a playful and delicious touch to your celebration.

From pastel-colored cupcakes and bunny-shaped cookies to no-bake treats and fruity delights, each dessert on this list brings a unique twist to the Easter table. They’re perfect for both kids and adults, combining nostalgic holiday fun with flavors that everyone can enjoy. Think rich chocolate nests, creamy cheesecakes with a spring makeover, marshmallow-filled surprises, and vibrant fruit tarts that look as good as they taste. These aren’t your average desserts—they’re smile-makers, memory-creators, and centerpiece-worthy sweets.
Whether you love baking from scratch or need a quick, crowd-pleasing idea, there’s something here for every level of baker. Plus, these desserts are as beautiful as they are tasty—ideal for your Easter photos and Pinterest boards. With every scroll, you’ll discover new inspiration to make your holiday gathering extra special.
So grab your apron, stock up on sprinkles, and let’s hop right into the most cheerful and crave-worthy Easter desserts around!
Coconut Macaroon Nests
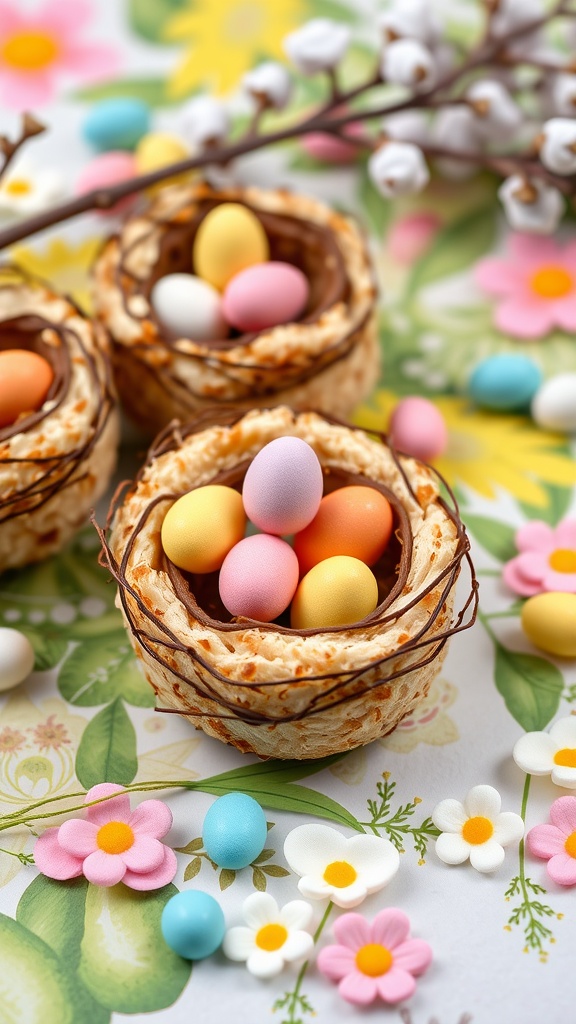
Coconut macaroon nests are a delightful treat that brings a fun twist to traditional macaroon recipes. These sweet nests have a chewy texture filled with rich coconut flavor, making them a tasty addition to any Easter celebration. They’re easy to whip up and can be a lovely activity for both kids and adults!
The best part about these nests is that they’re highly customizable. You can fill them with colorful chocolate eggs or any candies your heart desires. So, gather your ingredients and let’s create a charming dessert that’s sure to impress.
Ingredients
- 2 1/2 cups sweetened shredded coconut
- 1/2 cup sweetened condensed milk
- 1 teaspoon vanilla extract
- 2 large egg whites
- 1/4 teaspoon salt
- 1/2 cup chocolate chips (for drizzling)
- Assorted candy eggs (for filling)
Instructions
- Preheat the oven to 325°F (160°C) and line a baking sheet with parchment paper.
- In a large bowl, mix together the shredded coconut, sweetened condensed milk, vanilla extract, egg whites, and salt until well combined.
- Using your hands or a spoon, form small nests by scooping a tablespoon of the mixture and shaping it into a nest shape on the baking sheet. Make a small indentation in the center of each nest.
- Bake for 20-25 minutes or until the edges are golden brown. Allow to cool completely on the baking sheet.
- Once cooled, melt the chocolate chips in a microwave-safe bowl. Drizzle the melted chocolate over the nests and let it set.
- Fill each nest with assorted candy eggs before serving. Enjoy!
Bunny-Shaped Sugar Cookies

Bunny-shaped sugar cookies are a delightful treat that’s perfect for Easter celebrations. These cookies are soft and buttery, with a sweet vanilla flavor that makes them irresistible. They are easy to make, great for kids to help decorate, and can be customized in so many fun ways!
The process of rolling out the dough and cutting it into bunny shapes is simple and enjoyable. Once baked, let your creativity shine by decorating them with colorful icing and fun edible decorations. These cookies not only taste great but also make for charming additions to any Easter table.
Ingredients
- 3 cups all-purpose flour
- 1 teaspoon baking powder
- 1/2 teaspoon salt
- 1 cup unsalted butter, softened
- 1 1/2 cups granulated sugar
- 1 large egg
- 1 teaspoon vanilla extract
- 1/2 teaspoon almond extract (optional)
- Colored icing for decoration
- Edible decorations (like sprinkles or candy eyes)
Instructions
- Prepare the Dough: In a medium bowl, mix together flour, baking powder, and salt. In a large bowl, beat the butter and sugar together until light and fluffy. Add the egg, vanilla extract, and almond extract, mixing well. Gradually add the dry ingredients until a soft dough forms.
- Chill the Dough: Divide the dough into two portions, flatten each into a disk, wrap in plastic wrap, and refrigerate for at least 1 hour.
- Preheat the Oven: Preheat your oven to 350°F (175°C) and line baking sheets with parchment paper.
- Roll Out the Dough: On a floured surface, roll out one disk of dough to about 1/4 inch thick. Use a bunny-shaped cookie cutter to cut out shapes and transfer them to the prepared baking sheets.
- Bake the Cookies: Bake for 8-10 minutes, or until the edges just start to turn golden. Let them cool on the baking sheets for a few minutes before transferring them to wire racks to cool completely.
- Decorate: Once the cookies are completely cool, use colored icing and edible decorations to bring your bunnies to life. Let the icing set before serving.
Chocolate Bunny Cake
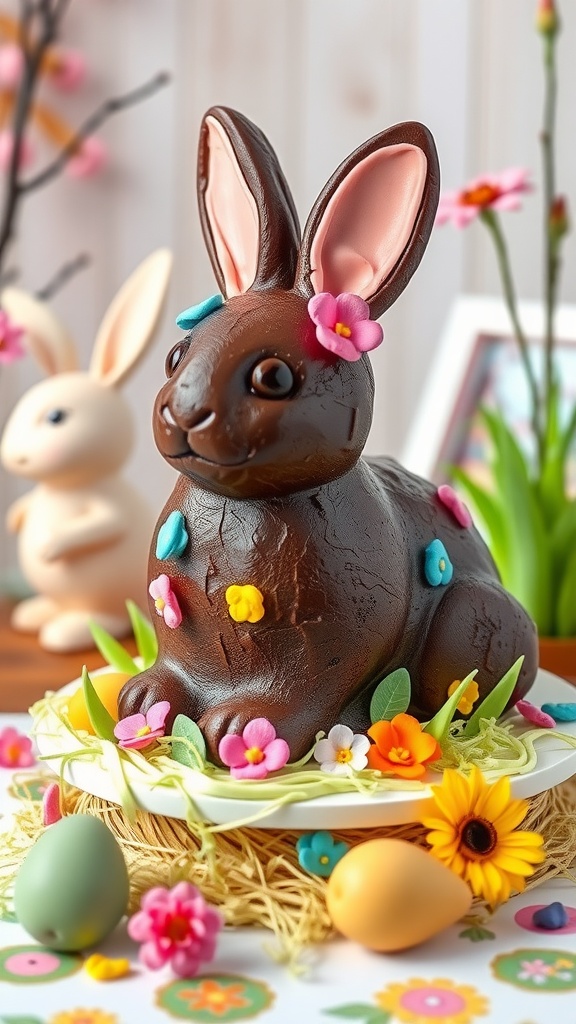
This Chocolate Bunny Cake is a delightful treat that adds a playful touch to your Easter celebrations. With its rich chocolate flavor and charming bunny design, it’s sure to be a hit with both kids and adults alike. The cake is not overly complicated to make, making it a fun activity to do with family or friends during the holiday.
The combination of moist chocolate cake and creamy frosting creates a wonderfully tasty dessert that pairs perfectly with springtime festivities. Plus, the vibrant decorations, like colorful flowers and candies, make it visually appealing. Get ready to bring some sweetness to your holiday table!
Ingredients
- 1 ¾ cups all-purpose flour
- 1 ¾ cups granulated sugar
- ¾ cup unsweetened cocoa powder
- 1 ½ teaspoons baking powder
- 1 ½ teaspoons baking soda
- 1 teaspoon salt
- 2 large eggs
- 1 cup whole milk
- ½ cup vegetable oil
- 2 teaspoons vanilla extract
- 1 cup boiling water
- 2 cups chocolate frosting
- Decorative candies and edible flowers
Instructions
- Preheat your oven to 350°F (175°C). Grease and flour a bunny-shaped cake pan.
- In a large bowl, combine flour, sugar, cocoa powder, baking powder, baking soda, and salt. Mix well.
- Add eggs, milk, vegetable oil, and vanilla extract. Beat on medium speed for about 2 minutes until everything is well combined.
- Stir in the boiling water until the batter is smooth. The batter will be thin.
- Pour the batter into the prepared cake pan and bake for 30-35 minutes or until a toothpick comes out clean.
- Once baked, let the cake cool in the pan for 10 minutes before transferring it to a wire rack to cool completely.
- Once cooled, frost the cake with chocolate frosting and decorate with candies and edible flowers to create a festive look.
Easter Basket Brownies
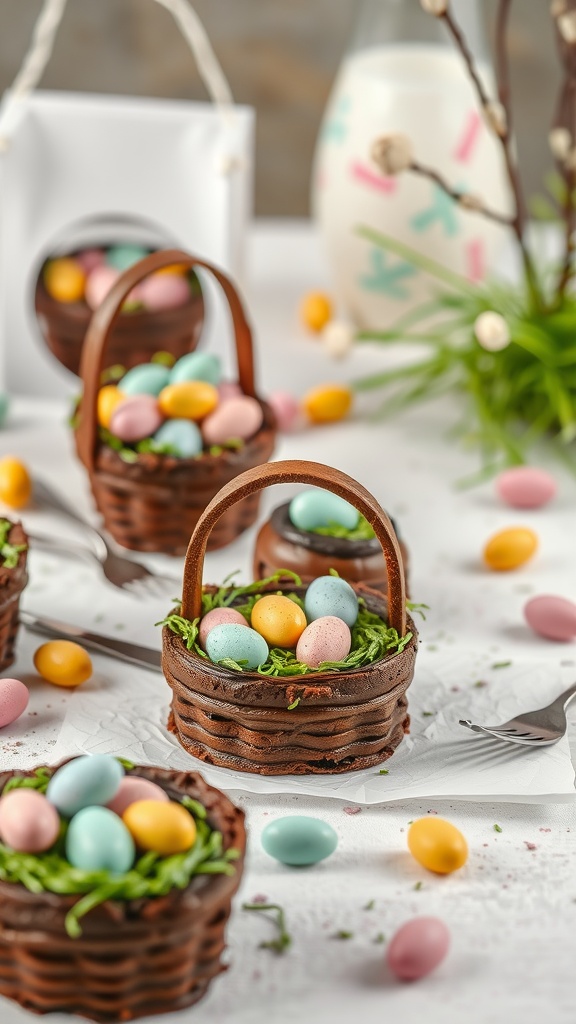
Easter Basket Brownies are a delightful treat that perfectly captures the spirit of the holiday. With a rich and fudgy brownie base, these desserts are topped with colorful candies that resemble Easter eggs, making them both tasty and visually appealing. They bring a playful twist to your Easter celebrations and are surprisingly easy to make, making them a fun project for bakers of all levels.
The combination of chocolatey goodness from the brownies and the sweet crunch of candy creates a delicious contrast that everyone will love. Plus, decorating them feels like an art project, adding extra fun to your baking experience. Grab your ingredients and let’s create something festive!
Ingredients
- 1 cup unsalted butter
- 2 cups granulated sugar
- 4 large eggs
- 1 teaspoon vanilla extract
- 1 cup all-purpose flour
- 1 cup cocoa powder
- 1/2 teaspoon salt
- 1/2 teaspoon baking powder
- 1 cup green coconut (for nest effect)
- 1 cup assorted candy eggs (for decoration)
Instructions
- Preheat your oven to 350°F (175°C) and grease a 9×13 inch baking dish.
- In a large saucepan over low heat, melt the butter. Remove from heat and stir in the sugar, eggs, and vanilla until well combined.
- In a separate bowl, mix together the flour, cocoa powder, salt, and baking powder. Gradually add this mixture to the butter mixture until just combined.
- Pour the brownie batter into the prepared baking dish and spread evenly. Bake for about 25-30 minutes, or until a toothpick inserted into the center comes out clean.
- Let the brownies cool completely in the pan. Once cooled, cut them into small squares.
- To assemble, place a brownie square in the center of a plate, top with a mound of green coconut to create a nest look, and decorate with assorted candy eggs.
Pistachio Pudding Parfaits
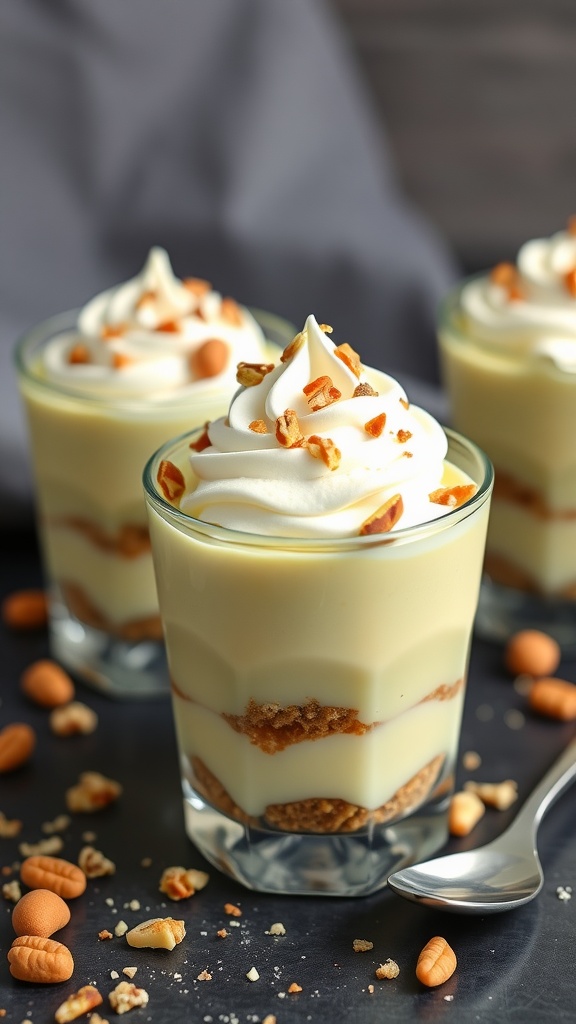
Pistachio pudding parfaits are a delightful treat that brings a burst of flavor and color to your Easter celebrations. The creamy, nutty taste of pistachio pudding is layered with crunchy graham cracker crumbs and topped off with fluffy whipped cream, making it a simple yet satisfying dessert. Plus, they are easy to assemble, allowing you to spend more time enjoying the holiday with family and friends.
These parfaits not only look appealing but also offer a refreshing taste that balances sweetness with a hint of nuttiness. Perfect for any gathering, they can be made ahead of time and stored in the fridge until you’re ready to serve. Gather your ingredients and let’s get started on this fun dessert!
Ingredients
- 1 package (3.4 oz) instant pistachio pudding mix
- 2 cups cold milk
- 1 cup whipped topping, thawed
- 1 cup graham cracker crumbs
- 1/2 cup chopped pistachios for topping
Instructions
- Prepare the Pistachio Pudding: In a mixing bowl, combine the instant pistachio pudding mix and cold milk. Whisk for about 2 minutes until well blended and thickened.
- Fold in Whipped Topping: Gently fold in the whipped topping to the pistachio pudding mixture until fully combined, creating a creamy texture.
- Layer the Parfaits: In serving glasses or bowls, start by adding a layer of graham cracker crumbs, followed by a layer of the pistachio pudding mixture. Repeat the layers until the glasses are filled.
- Top with Whipped Cream: Finish each parfait with a dollop of whipped topping and sprinkle with chopped pistachios for added crunch and decoration.
- Chill and Serve: Place the parfaits in the refrigerator for at least 30 minutes before serving to let the flavors meld. Enjoy your festive dessert!
Carrot Cake Cupcakes with Cream Cheese Frosting

Carrot cake cupcakes are a delightful twist on the classic dessert, perfect for celebrating Easter. These cupcakes are moist and flavorful, combining the sweetness of carrots with warm spices like cinnamon and nutmeg. Topped with a creamy, tangy cream cheese frosting, they provide a lovely balance that is sure to please everyone at your gathering.
Making these cupcakes is quite simple, making them a fun baking project for both beginners and experienced bakers alike. You’ll enjoy the lovely aroma as they bake, and decorating them is a chance for creativity. Add some cute bunny toppers or colorful sprinkles, and they’ll be a hit on your dessert table.
Ingredients
- 1 1/2 cups all-purpose flour
- 1 teaspoon baking soda
- 1 teaspoon baking powder
- 1 teaspoon ground cinnamon
- 1/2 teaspoon ground nutmeg
- 1/4 teaspoon salt
- 1/2 cup vegetable oil
- 1 cup granulated sugar
- 2 large eggs
- 1 teaspoon vanilla extract
- 1 1/2 cups grated carrots
- 1/2 cup crushed pineapple, drained
- 1/2 cup chopped walnuts (optional)
- 8 oz cream cheese, softened
- 1/2 cup unsalted butter, softened
- 4 cups powdered sugar
- 1 teaspoon vanilla extract
Instructions
- Preheat the oven to 350°F (175°C) and line a muffin tin with cupcake liners.
- In a bowl, whisk together flour, baking soda, baking powder, cinnamon, nutmeg, and salt.
- In a separate bowl, beat together the oil and sugar until well combined. Add the eggs one at a time, mixing well after each addition, then stir in the vanilla.
- Gradually add the dry ingredients to the wet mixture, stirring until just combined. Fold in the grated carrots, crushed pineapple, and walnuts if using.
- Divide the batter evenly among the cupcake liners, filling each about 2/3 full. Bake for 18-20 minutes, or until a toothpick inserted in the center comes out clean.
- While the cupcakes are cooling, prepare the frosting. Beat together the cream cheese and butter until smooth. Gradually add the powdered sugar and vanilla, mixing until fluffy.
- Once the cupcakes are completely cool, frost them generously with the cream cheese frosting and enjoy!
Mini Cheesecake Easter Egg Bites
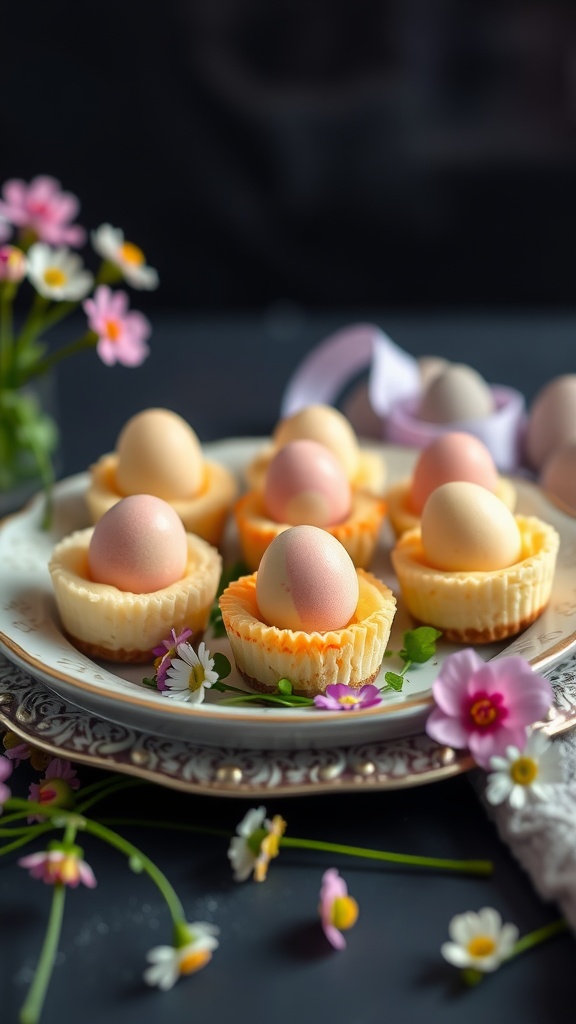
These Mini Cheesecake Easter Egg Bites are a delightful treat that combines the creamy goodness of cheesecake with the fun, festive shape of Easter eggs. They are sweet, tangy, and just the right size for a bite-sized indulgence, making them perfect for gatherings or as a sweet surprise for family and friends. Plus, these bites are quite simple to whip up, even for those who might not consider themselves experienced bakers.
Get creative with toppings and colors to make them your own. The cheesecake filling can be flavored with vanilla or even a hint of lemon zest for an extra zing. Not only do they taste delicious, but they also look adorable on any dessert table, adding a cheerful touch to your Easter celebrations.
Ingredients
- 1 cup graham cracker crumbs
- 1/4 cup granulated sugar
- 1/2 cup unsalted butter, melted
- 16 oz cream cheese, softened
- 1 cup powdered sugar
- 1 teaspoon vanilla extract
- 2 large eggs
- Food coloring (pastel colors)
- Chocolate eggs or candy eggs for topping
Instructions
- Preheat your oven to 325°F (160°C). Line a mini muffin tin with paper liners.
- In a bowl, mix graham cracker crumbs, granulated sugar, and melted butter until well combined. Press the mixture into the bottom of each muffin liner to form a crust.
- In a separate bowl, beat the cream cheese until smooth. Gradually add the powdered sugar and vanilla extract, mixing until well combined.
- Add the eggs one at a time, mixing until just incorporated. If desired, divide the mixture into smaller bowls and add different food coloring to each bowl.
- Spoon the cheesecake mixture into the prepared crusts, filling them about 3/4 full. Bake for 15-20 minutes, until the centers are set but still slightly jiggly.
- Remove from the oven and let cool completely before refrigerating for at least two hours.
- Once chilled, top each cheesecake bite with a chocolate egg or candy egg and serve chilled.
Lemon Meringue Pie with Easter Eggs
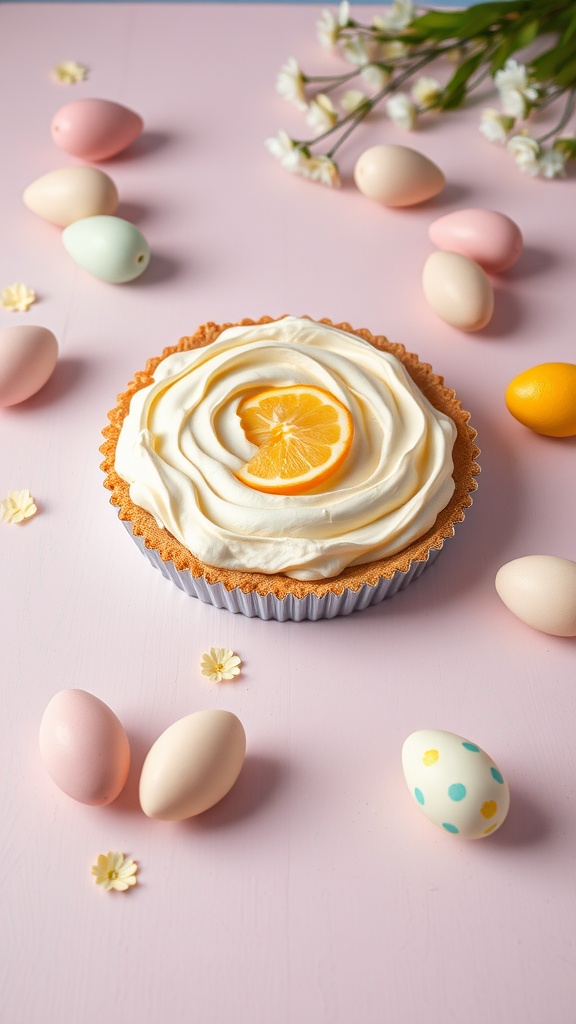
Lemon meringue pie is a delightful dessert that combines a tangy lemon filling with a fluffy meringue topping. It offers a refreshing burst of citrus flavor, making it a perfect treat for Easter gatherings. Plus, its bright and cheerful presentation fits right in with the festive spirit of the holiday.
This pie is surprisingly simple to make, even for those who may not consider themselves bakers. With just a few steps, you can create a dessert that is sure to impress your guests while offering a delicious contrast of textures and flavors.
Ingredients
- 1 pre-made pie crust
- 1 cup sugar
- 2 tablespoons cornstarch
- 1/4 teaspoon salt
- 1 1/2 cups water
- 3 large egg yolks
- 1/2 cup fresh lemon juice
- 2 tablespoons lemon zest
- 1 tablespoon butter
- 3 large egg whites
- 1/4 teaspoon cream of tartar
- 1/2 cup sugar (for meringue)
Instructions
- Preheat the oven to 350°F (175°C). Bake the pie crust according to package instructions until golden brown. Let it cool.
- In a saucepan, whisk together sugar, cornstarch, and salt. Gradually stir in water, cooking over medium heat until thickened.
- In a bowl, mix egg yolks, lemon juice, and lemon zest. Slowly add a small amount of the hot mixture to the yolks, whisking constantly to temper them before adding the yolk mixture back into the saucepan. Stir in the butter and cook for a few more minutes until thick.
- Pour the lemon filling into the cooled pie crust.
- For the meringue, beat egg whites and cream of tartar until soft peaks form. Gradually add sugar, continuing to beat until stiff peaks form. Spread meringue over the lemon filling, sealing the edges.
- Bake for 10-15 minutes until the meringue is golden. Let it cool before serving, and enjoy your festive lemon meringue pie adorned with decorations like colorful Easter eggs!
Chocolate-Covered Strawberries with Spring Sprinkles

Chocolate-covered strawberries are a delightful treat that’s perfect for Easter celebrations. The combination of juicy, ripe strawberries and rich chocolate creates a taste sensation that feels indulgent yet refreshing. Plus, the addition of colorful spring sprinkles adds a playful touch, making them not only delicious but also visually appealing!
This recipe is simple to prepare and requires just a few ingredients, making it an excellent choice for both experienced bakers and those new to the kitchen. You can whip these up in no time, and they’re sure to be a hit at any gathering!
Ingredients
- 1 pound fresh strawberries, washed and dried
- 8 ounces semi-sweet chocolate chips
- 1 tablespoon coconut oil (optional)
- 1/4 cup assorted spring sprinkles
Instructions
- Melt the Chocolate: In a microwave-safe bowl, combine the chocolate chips and coconut oil (if using). Heat in the microwave in 30-second intervals, stirring in between, until completely melted and smooth.
- Dip the Strawberries: Hold each strawberry by the stem and dip it into the melted chocolate, allowing any excess to drip off. Place the dipped strawberry onto a parchment-lined baking sheet.
- Add Sprinkles: While the chocolate is still wet, sprinkle the assorted spring sprinkles over the chocolate-covered strawberries to decorate.
- Let Set: Allow the chocolate to set at room temperature for about 30 minutes or refrigerate for faster setting.
- Serve: Once the chocolate has hardened, your chocolate-covered strawberries are ready to enjoy. Serve them on a platter for a festive touch!
Berry Pavlova Nest
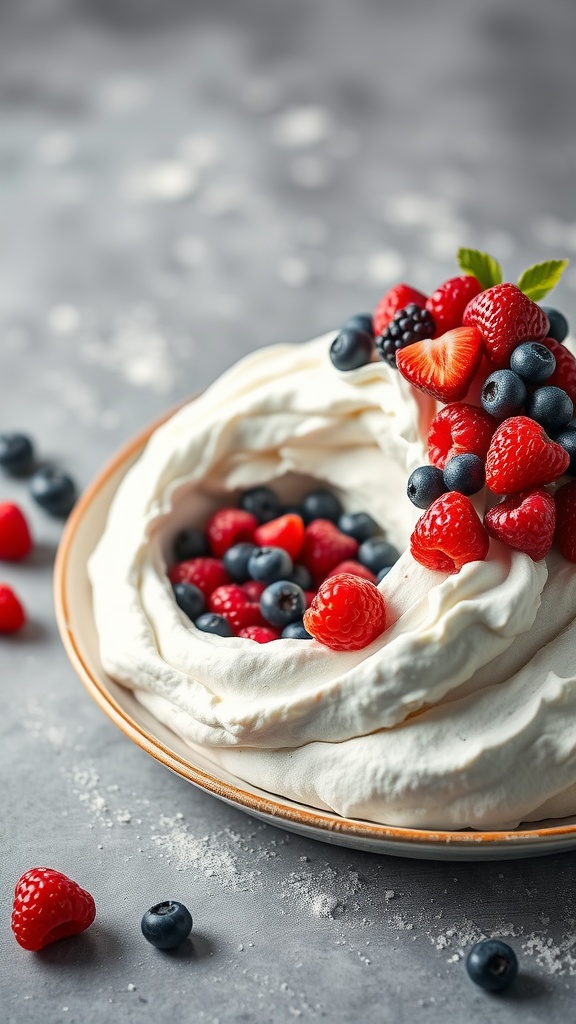
Berry Pavlova Nest is a delightful dessert that combines a light and airy meringue shell with fresh berries and whipped cream. The outer shell has a crisp texture, while the inside is soft and chewy, creating a beautiful contrast. This dessert is not only tasty but also showcases vibrant colors, making it a perfect choice for Easter celebrations.
Making a Berry Pavlova Nest is quite simple, even for beginner bakers. With just a few ingredients, you can whip up a show-stopping dessert that everyone will love. It’s a wonderful way to enjoy seasonal berries and impress your guests!
Ingredients
- 4 large egg whites
- 1 cup granulated sugar
- 1 teaspoon vanilla extract
- 1 teaspoon white vinegar
- 1 cup heavy whipping cream
- 2 tablespoons powdered sugar
- 1 cup mixed berries (strawberries, raspberries, blueberries)
- Mint leaves for garnish (optional)
Instructions
- Preheat your oven to 250°F (120°C) and line a baking sheet with parchment paper.
- In a clean, dry bowl, beat the egg whites on medium speed until soft peaks form. Gradually add the granulated sugar, a tablespoon at a time, and continue beating until the mixture is glossy and stiff peaks form.
- Gently fold in the vanilla extract and white vinegar. Spoon the meringue onto the prepared baking sheet, shaping it into a large round nest with a slight indentation in the center.
- Bake for 1 hour, then turn off the oven and let the meringue cool completely inside the oven.
- Once cooled, whip the heavy cream with powdered sugar until soft peaks form. Spoon the whipped cream into the center of the meringue nest.
- Top with mixed berries and garnish with mint leaves if desired. Serve immediately and enjoy your Berry Pavlova Nest!
Fruit Tart with Colorful Glaze
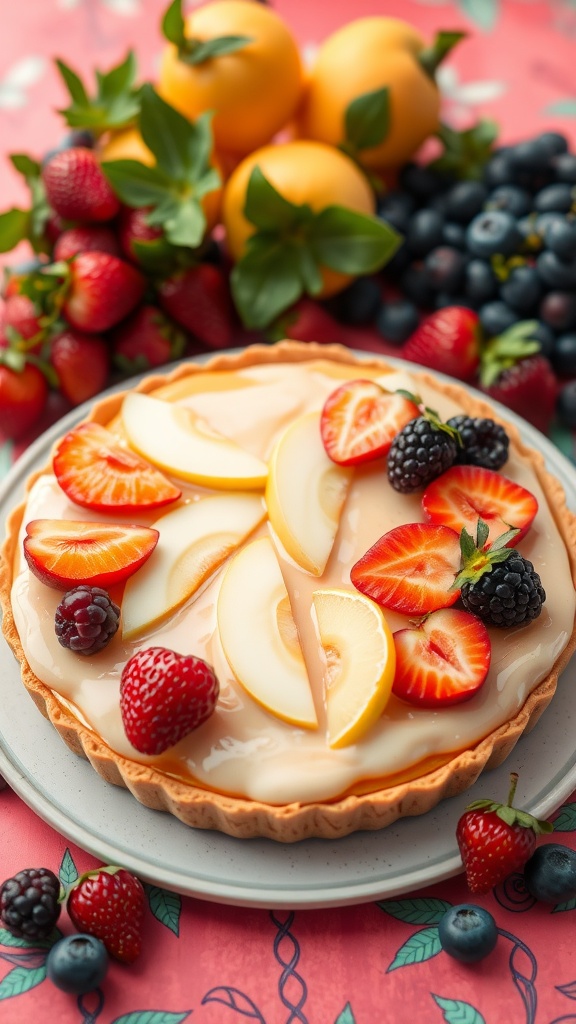
If you’re looking for a delightful dessert that brings a burst of color and flavor to your Easter table, this fruit tart is just what you need! With its buttery crust, creamy filling, and an array of fresh fruits, it’s both refreshing and satisfying. This recipe is easy to follow, making it a great choice for bakers of all skill levels.
Imagine the sweet taste of ripe strawberries, blueberries, and peaches coming together in a visually appealing way. The glossy glaze adds a beautiful finish that makes this tart look as good as it tastes. It’s a dessert that’s sure to impress your family and friends!
Ingredients
- 1 ½ cups all-purpose flour
- ½ cup unsalted butter, softened
- ¼ cup granulated sugar
- 1 large egg yolk
- 2-3 tablespoons cold water
- 1 cup cream cheese, softened
- ½ cup powdered sugar
- 1 teaspoon vanilla extract
- 2 cups mixed fresh fruit (e.g., strawberries, blueberries, peaches)
- ½ cup fruit glaze (store-bought or homemade)
Instructions
- Make the Crust: Preheat your oven to 350°F (175°C). In a bowl, mix flour, butter, sugar, and egg yolk until crumbly. Add cold water, a tablespoon at a time, until the dough forms.
- Form and Bake: Press the dough into a tart pan evenly. Use a fork to poke holes in the base. Bake for 20-25 minutes until lightly golden. Allow to cool completely.
- Prepare the Filling: In a bowl, beat together cream cheese, powdered sugar, and vanilla until smooth. Spread the mixture evenly over the cooled tart crust.
- Add the Fruit: Arrange the fresh fruit on top of the cream cheese layer in a decorative pattern.
- Finish with Glaze: Brush the fruit with the fruit glaze to give it a beautiful shine. Chill the tart in the refrigerator for at least 30 minutes before serving.
Marshmallow Peep Trifle

The Marshmallow Peep Trifle is a delightful dessert that brings a playful twist to your Easter celebrations. Layers of fluffy cake, creamy pudding, and colorful marshmallows create a fun, vibrant treat that both kids and adults will enjoy. With its light and sweet flavor, this trifle is sure to be a crowd-pleaser.
This dessert is simple to prepare, making it a perfect choice for busy holiday gatherings. You can whip it up in no time, and the best part is that it can be made ahead of time, leaving you free to enjoy the festivities. Let’s dive into the delicious details!
Ingredients
- 1 box of yellow cake mix
- 3 cups milk
- 1 package of instant vanilla pudding
- 2 cups whipped cream
- 1 package of marshmallow Peeps (various colors)
- 1 cup mini marshmallows
Instructions
- Prepare the Cake: Bake the yellow cake according to package instructions. Once baked, let it cool completely before cutting it into cubes.
- Make the Pudding: In a large bowl, whisk together the instant vanilla pudding mix and milk. Let it sit for about 5 minutes until it thickens.
- Layer the Trifle: In a large trifle dish or bowl, start with a layer of cake cubes at the bottom. Add a layer of the pudding mixture, followed by a layer of whipped cream. Repeat the layers until the dish is full.
- Top it Off: Finish with a layer of whipped cream, and arrange the marshmallow Peeps and mini marshmallows on top for decoration.
- Chill and Serve: Refrigerate the trifle for at least 2 hours before serving to allow the flavors to meld together. Enjoy!
Final Thoughts
Easter is all about joy, togetherness, and treats that bring people closer, and these 12 fun Easter desserts deliver on all fronts. Whether you’re aiming to impress guests or simply want to share sweet moments with your family, these ideas are sure to spark smiles and maybe even start a few new traditions. Save your favorites, try something new, and don’t forget to enjoy the process—after all, the best desserts are the ones made with love and a little bit of fun. Happy Easter and happy baking!