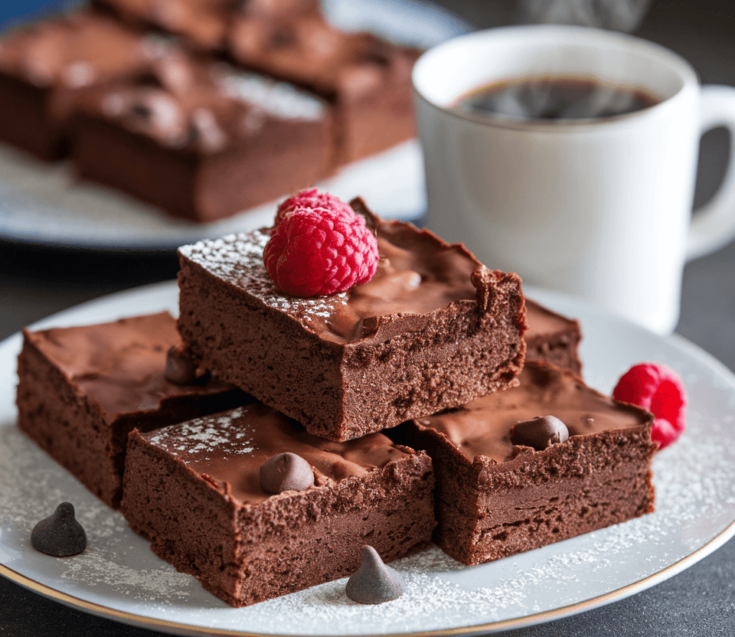
Indulge in a deliciously rich Protein Chocolate Brownie that not only satisfies your sweet tooth but also packs a nutritious punch. These brownies are fudgy, decadent, and perfectly chewy, making them an ideal treat for fitness enthusiasts and dessert lovers alike. With a blend of protein powder and wholesome ingredients, you can enjoy this classic dessert guilt-free while fueling your body.

Why You Will Love This Recipe
This protein chocolate brownie recipe is a game changer for anyone looking to enjoy a treat without compromising their health goals. The rich, chocolatey flavor is so satisfying that you won’t even notice they’re packed with protein. They’re incredibly easy to make, requiring minimal prep time and just one bowl to mix everything, which means less cleanup! Plus, they fit well into many diets, whether you’re following a fitness regimen, trying to cut refined sugars, or simply seeking a healthier dessert option.
Tips and Tricks
To make this recipe even easier, ensure all your ingredients are at room temperature before mixing; this helps create a smooth batter. Use a good quality cocoa powder for richer flavor, and don’t skip the step of letting the brownies cool completely before cutting them—this helps them set and prevents crumbling. For added flavor, consider folding in some chocolate chips or chopped nuts for a textural contrast.
Common Mistakes to Avoid
A common mistake when making brownies is overmixing the batter; this can lead to a tough texture. Stick to just mixing until combined. Another pitfall is underbaking; ensure you check for doneness with a toothpick—if it comes out with a few moist crumbs, they’re perfect. Lastly, be cautious with substitutions; using the wrong type of protein powder can affect both flavor and texture, so try to stick to the recommended kind.
Make Ahead Tips
You can prepare the batter a day in advance and store it in the refrigerator until you’re ready to bake. Alternatively, the brownies themselves can be made ahead of time and stored in an airtight container for up to a week. If you want to freeze them, slice the brownies first and layer them with parchment paper before freezing; they’ll stay fresh for up to three months.
Recipe Variations
Feel free to customize your brownies! Swap out the chocolate protein powder for vanilla for a different flavor profile, or add in some peanut butter for a nutty twist. If you’re looking for a lower-carb option, use almond flour instead of regular flour. For a vegan version, replace eggs with flax eggs and ensure your protein powder is plant-based.
How to Serve
Serve these protein chocolate brownies warm with a scoop of vanilla ice cream or a dollop of whipped cream on top for an indulgent touch. Dust with a sprinkle of powdered sugar or cocoa powder for a beautiful presentation. Pair with fresh berries or a drizzle of chocolate sauce to elevate the dish further.
Pairing Suggestions
For a delightful drink pairing, consider a rich cup of espresso or cold brew coffee, which complements the chocolate flavor beautifully. If you prefer something sweeter, a glass of almond milk or a protein shake can be a great choice. For a side, a simple fruit salad or yogurt parfait can balance the richness of the brownies.
How to Store
To store leftovers, keep the brownies in an airtight container at room temperature for up to five days. For longer storage, wrap them tightly in plastic wrap and place them in the freezer. When you’re ready to enjoy, simply thaw at room temperature or microwave for a few seconds for that freshly baked taste.
Equipment Needed
You will need a mixing bowl, a whisk or electric mixer, a measuring cup, and a baking pan (8×8 inches is ideal). If you don’t have a baking pan, you can also use a silicone mold to create fun shapes. A spatula for spreading the batter and a toothpick for testing doneness are also essential.
Dietary Adaptations
For a vegan version, substitute eggs with flaxseed meal mixed with water, and use dairy-free chocolate chips. To make it gluten-free, opt for a gluten-free flour blend. For nut-free options, use sunflower seed butter instead of nut butter, and check your protein powder to ensure it’s free from allergens.
Seasonal Adaptations
In the fall, consider adding spices like cinnamon or pumpkin pie spice to the batter for a seasonal twist. During the summer, you might fold in fresh berries like raspberries or strawberries for a refreshing touch. In winter, a hint of peppermint extract can add a festive flair.
Cost Breakdown
On average, the cost to make a batch of protein chocolate brownies is around $10-$12, yielding about 12 servings. Using bulk ingredients like oats and cocoa powder can help reduce costs. Purchasing protein powder in larger quantities can also save you money in the long run.
Kitchen Hacks
For easy cleanup, line your baking pan with parchment paper before pouring in the batter. This not only prevents sticking but also makes it easier to lift out the brownies once baked. If you need to soften butter quickly, cut it into small cubes and let it sit at room temperature for about 15 minutes.
Recipe FAQs
1. Can I use a different protein powder? Yes, but be aware that different powders may affect texture and flavor. Whey protein tends to yield the best results.
2. How long do these brownies take to bake? Bake them for about 20-25 minutes, but always check with a toothpick for doneness.
3. What if I can’t find cocoa powder? You can substitute with carob powder, but keep in mind the flavor will change slightly.
Protein Chocolate Brownie
Indulge in a deliciously rich Protein Chocolate Brownie that not only satisfies your sweet tooth but also packs a nutritious punch. These brownies are fudgy, decadent, and perfectly chewy, making them an ideal treat for fitness enthusiasts and dessert lovers alike.
Ingredients
- 1 cup almond flour
- ½ cup unsweetened cocoa powder
- ½ cup chocolate protein powder
- ½ cup honey or maple syrup
- 2 large eggs
- ¼ cup melted coconut oil
- 1 tsp vanilla extract
- ½ tsp baking powder
- ¼ tsp salt
- Optional: ½ cup chocolate chips or nuts
Instructions
- Preheat your oven to 350°F (175°C) and grease an 8×8 baking pan or line it with parchment paper.
- In a large mixing bowl, whisk together the almond flour, cocoa powder, protein powder, baking powder, and salt until well combined.
- In another bowl, mix the melted coconut oil, honey (or maple syrup), eggs, and vanilla extract until smooth.
- Pour the wet ingredients into the dry ingredients and mix until just combined. Fold in chocolate chips or nuts, if using.
- Pour the batter into the prepared baking pan and spread it evenly.
- Bake for 20-25 minutes, or until a toothpick inserted in the center comes out with a few moist crumbs.
- Allow the brownies to cool in the pan for at least 15 minutes before slicing into squares.
Nutrition Information
Yield
12Serving Size
1Amount Per Serving Calories 232Total Fat 14gSaturated Fat 6gTrans Fat 0gUnsaturated Fat 7gCholesterol 32mgSodium 95mgCarbohydrates 22gFiber 3gSugar 17gProtein 8g
TastyFitnessRecipes.com, occasionally offers nutritional information for recipes contained on this site. This information is provided as a courtesy and is an estimate only. This information comes from online calculators. Although tastyfitnessrecipes.com attempts to provide accurate nutritional information, these figures are only estimates.
Final Thoughts
This protein chocolate brownie recipe is a delightful way to enjoy a classic dessert while nourishing your body. The combination of rich chocolate flavor and protein makes it a fantastic choice for a post-workout treat or a satisfying dessert. Whether you’re serving them to friends or enjoying them solo, these brownies are sure to impress. Happy baking!