Chocolate Lava Cake is the epitome of dessert indulgence, presenting an elegant yet simple way to satisfy your chocolate cravings. With a rich, molten center that flows out like a warm chocolate river when you cut into it, this dessert is a true showstopper. Perfect for special occasions or a romantic dinner, its deep, luscious flavor and gooey texture make it an irresistible treat that leaves a lasting impression.

Why You Will Love This Recipe
You will absolutely love this Chocolate Lava Cake recipe for its incredible flavor and ease of preparation. The combination of dark chocolate and butter creates a decadent richness that is perfectly balanced by the lightness of the egg and sugar mixture. Despite its gourmet appearance, this recipe is surprisingly straightforward—ideal for both novice bakers and seasoned chefs. Additionally, it can easily fit into special diets; by opting for gluten-free flour or dairy-free chocolate, you can make it suitable for those with specific dietary needs.
Tips and Tricks
- Use high-quality chocolate: The better the chocolate, the richer the flavor of your lava cake. Look for at least 60% cocoa content for the best results.
- Prep your ramekins: To ensure easy release after baking, butter and lightly dust with cocoa powder or flour before filling with batter.
- Experiment with baking times: Every oven is different; keep an eye on your cakes as they bake. A minute too long can turn your molten center into a more traditional cake.
- Serve immediately: This dessert is best enjoyed fresh out of the oven, so plan to serve it right after baking for that gooey center.
Common Mistakes to Avoid
- Overbaking: The key to a perfect lava cake is underbaking it just enough so that the center remains molten. A common mistake is leaving it in the oven too long.
- Incorrect ramekin size: Make sure to use the appropriate size ramekins for your recipe. Using larger ones can lead to a longer baking time and a less molten center.
- Forgetting to prep ramekins: Skipping the butter and cocoa dusting can lead to cakes sticking to the sides, making them difficult to remove.
Make Ahead Tips
You can prepare the batter ahead of time and store it in the refrigerator for up to 24 hours. Simply fill the ramekins, cover with plastic wrap, and place them in the fridge. When you’re ready to bake, just add a couple of minutes to the baking time to account for the cold batter.
Recipe Variations
- Nutty Delight: Fold in some chopped hazelnuts or walnuts into the batter for a crunchy texture contrast.
- Flavor Infusions: Add a splash of espresso, vanilla extract, or orange zest for a flavor twist.
- Different Chocolates: Swap dark chocolate for milk or white chocolate for a different flavor profile. Just keep in mind that the molten center may vary in texture.
How to Serve
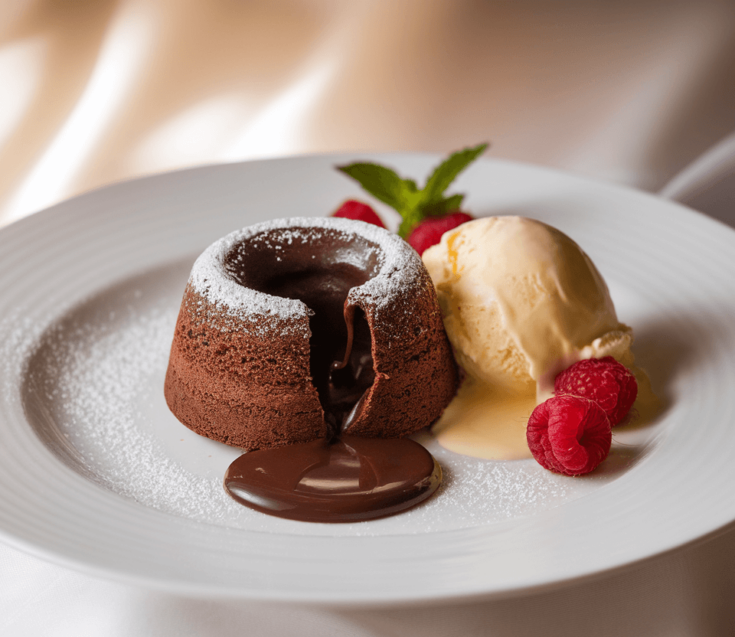
To serve your Chocolate Lava Cake, gently invert the ramekin onto a dessert plate, allowing the cake to fall out. Dust with powdered sugar for an elegant touch, and accompany it with a scoop of vanilla ice cream or a dollop of whipped cream. Fresh berries, such as raspberries or strawberries, make a stunning garnish that adds a pop of color and acidity to balance the richness.
Pairing Suggestions
For drink pairings, a rich red wine like Cabernet Sauvignon or a dessert wine such as Port complements the chocolate beautifully. Alternatively, you can serve it with a strong cup of coffee or espresso to enhance the chocolate flavors. For side dishes, consider a light salad or a fruit sorbet for a refreshing contrast.
How to Store
Leftover Chocolate Lava Cakes can be stored in the refrigerator for up to 2 days. To reheat, place them in a preheated oven at 350°F for about 8-10 minutes, or until warmed through. Avoid microwaving as this can cook the center too much, leading to a less molten effect.
Equipment Needed
- Ramekins: 4 to 6 oz size is ideal for individual servings.
- Mixing bowls
- Whisk or electric mixer
- Baking sheet
- Oven
Dietary Adaptations
To make this Chocolate Lava Cake vegan, substitute eggs with flaxseed meal mixed with water or use a commercial egg replacer. Replace butter with coconut oil or a vegan butter alternative, and opt for dairy-free chocolate. For nut-free adaptations, ensure any alternative ingredients do not contain nuts.
Seasonal Adaptations
In the fall, consider adding spices like cinnamon or nutmeg to the batter for a warm, seasonal twist. In the summer, serve the lava cake with fresh seasonal fruits like peaches or strawberries for a refreshing contrast.
Cost Breakdown
The total cost for this Chocolate Lava Cake recipe is approximately $10-$15, depending on the quality of chocolate and ingredients used. Each serving averages around $2.50. To save on costs, consider using semi-sweet chocolate chips instead of high-end chocolate bars.
Kitchen Hacks
- Melt chocolate more evenly by chopping it into small pieces before melting.
- To easily separate eggs, use the shell to transfer the yolk back and forth until the white is separated.
- Clean up quickly by using a bowl that can be used for mixing and melting chocolate in the microwave.
Recipe FAQs
- Can I use a different type of chocolate? Yes! Milk or white chocolate can be used, but keep in mind the texture and sweetness may vary.
- How do I know when my lava cake is done? The edges should be set, and the center should jiggle slightly when you gently shake the ramekin.
- Can I make these in advance? Absolutely! Prepare the batter ahead of time and bake them just before serving for the best results.
Chocolate Lava Cake
Chocolate Lava Cake is the epitome of dessert indulgence, presenting an elegant yet simple way to satisfy your chocolate cravings.
Ingredients
- 1/2 cup unsalted butter
- 1 cup high-quality dark chocolate (60-70% cocoa)
- 2 large eggs
- 2 large egg yolks
- 1/4 cup granulated sugar
- 2 tablespoons all-purpose flour
- Pinch of salt
- Optional: powdered sugar for dusting, and ice cream for serving
Instructions
- Preheat the oven to 425°F (220°C). Grease 4 ramekins with butter and dust with cocoa powder, tapping out any excess.
- In a microwave-safe bowl, melt the butter and dark chocolate together in 30-second intervals, stirring until smooth.
- In a separate bowl, whisk together the eggs, egg yolks, and sugar until thick and pale.
- Gradually mix the melted chocolate mixture into the egg mixture until well blended.
- Sift in the flour and salt, gently folding until just combined.
- Divide the batter evenly among the prepared ramekins.
- Place the ramekins on a baking sheet and bake for 12-14 minutes, or until the edges are firm but the center remains soft.
- Remove from the oven and let sit for 1 minute before inverting onto plates.
- Dust with powdered sugar and serve immediately with ice cream or whipped cream.
Nutrition Information
Yield
4Serving Size
1Amount Per Serving Calories 846Total Fat 50gSaturated Fat 29gTrans Fat 0gUnsaturated Fat 18gCholesterol 312mgSodium 150mgCarbohydrates 88gFiber 4gSugar 76gProtein 12g
TastyFitnessRecipes.com, occasionally offers nutritional information for recipes contained on this site. This information is provided as a courtesy and is an estimate only. This information comes from online calculators. Although tastyfitnessrecipes.com attempts to provide accurate nutritional information, these figures are only estimates.
Final Thoughts
Creating your own Chocolate Lava Cake at home is an achievable luxury that can elevate any occasion. With its rich flavor and stunning presentation, this dessert is sure to impress your guests and leave them craving more. Don’t hesitate to try this recipe and enjoy the process of crafting a dessert that is both simple and sophisticated. Happy baking!