This Pear Crisp recipe is a delightful dessert that perfectly balances the sweetness of ripe pears with a crunchy oat topping. It’s the kind of comfort food that evokes cozy autumn evenings, yet it’s accessible enough to enjoy any time of year. With its warm, golden-brown crust and juicy fruit filling, this pear crisp is an irresistible treat that is sure to please family and friends alike.

Why You Will Love This Recipe
You’ll love this pear crisp recipe for several reasons. Firstly, the flavor combination is unbeatable; the soft, sweet pears meld beautifully with the buttery, crunchy topping, creating a dish that feels indulgent without being overly heavy. The recipe is incredibly easy to follow, making it perfect for novice bakers and seasoned chefs alike. Plus, it fits well into a variety of diets, as it can easily be adapted to be gluten-free or vegan, ensuring that everyone can enjoy this delightful dessert.
Tips and Tricks
To elevate your pear crisp, consider these tips and tricks. For a burst of flavor, toss your pear slices with a little lemon juice and cinnamon before adding them to the baking dish. This not only enhances the fruit’s natural sweetness but also prevents browning. If you’re short on time, you can use pre-sliced pears or even canned pears; just make sure to drain them well. Lastly, for an extra crunchy topping, consider adding chopped nuts or using a mix of oats and crushed graham crackers.
Common Mistakes to Avoid
While making a pear crisp is straightforward, there are a few common mistakes to avoid. One mistake is using under-ripe pears, which won’t soften properly during baking; choose ripe, but firm pears for the best texture. Another pitfall is not mixing the topping ingredients enough, leading to a dry crust. Ensure the butter is well incorporated into the dry ingredients for a cohesive topping. Lastly, resist the urge to skip the pre-baking step; this ensures a perfectly crisp topping rather than a soggy one.
Make Ahead Tips
For those who like to plan ahead, you can prepare the topping and store it in the fridge for up to three days before baking. Simply combine the dry ingredients and butter, then keep it in an airtight container. You can also slice the pears and toss them with lemon juice to prevent browning; they’ll stay fresh in the fridge for up to a day. When you’re ready to bake, simply combine the pears and topping and pop it in the oven!
Recipe Variations
Feel free to get creative with this pear crisp recipe! You can swap out some of the pears for other fruits like apples or berries for a mixed fruit crisp. Consider adding spices such as nutmeg or ginger for a warming twist. For a unique flavor profile, try incorporating a splash of bourbon or vanilla extract into the fruit mixture. If you’re looking for a healthier version, substitute the brown sugar with coconut sugar or use honey as a natural sweetener.
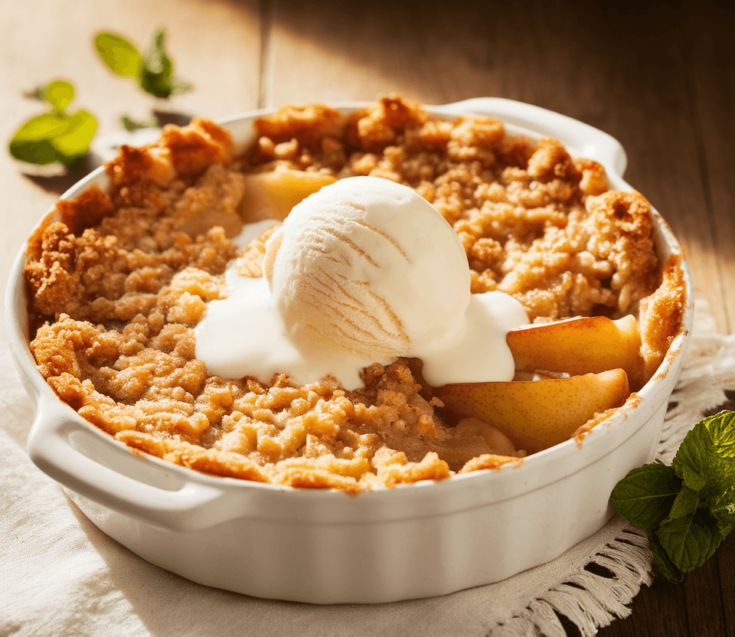
How to Serve
To serve your pear crisp, spoon generous portions into bowls while it’s still warm. A scoop of vanilla ice cream on top adds a delightful creaminess that contrasts perfectly with the warm, crunchy topping. For an elegant touch, sprinkle a bit of cinnamon or nutmeg on top, or garnish with fresh mint leaves. Serve with a drizzle of caramel sauce for an extra indulgent treat!
Pairing Suggestions
This pear crisp pairs wonderfully with a variety of beverages. A light Riesling or a crisp Sauvignon Blanc complements the sweetness of the dish beautifully. If you prefer cocktails, a spiced rum with ginger beer would enhance the warm flavors. For a non-alcoholic option, a cup of chamomile tea or a chilled sparkling cider works perfectly. On the side, consider serving a dollop of whipped cream or a simple green salad for a refreshing contrast.
How to Store
Leftover pear crisp can be stored in an airtight container in the refrigerator for up to three days. To reheat, simply place it in the oven at 350°F (175°C) for about 10-15 minutes, or until warmed through. If you want to extend its shelf life, you can freeze the crisp for up to three months. Just be sure to cover it tightly with plastic wrap and aluminum foil. When you’re ready to enjoy it, thaw in the fridge overnight and reheat as mentioned above.
Equipment Needed
You’ll need a few basic kitchen tools to make this pear crisp: a mixing bowl for combining the topping, a sharp knife for slicing the pears, and a baking dish (about 8×8 inches is ideal). If you prefer, you can use a food processor to mix the topping quickly. No fancy equipment is needed; just the essentials will do!
Dietary Adaptations
If you’re looking to make this pear crisp recipe vegan, substitute the butter with coconut oil or a vegan butter alternative. For a gluten-free option, simply use gluten-free oats and ensure that your other ingredients are certified gluten-free. If nuts are a concern, you can omit them from the topping or replace them with seeds like sunflower or pumpkin for added texture.
Seasonal Adaptations
While this recipe is perfect in the fall when pears are at their peak, you can easily adapt it for year-round enjoyment. In the summer, consider using peaches or apricots alongside the pears for a juicy twist. During the winter months, try adding dried fruits like cranberries or raisins for a more festive flavor profile. The beauty of this recipe is its versatility!
Cost Breakdown
This pear crisp recipe is budget-friendly, with an estimated cost of around $10 for the entire dish, which serves 6-8 people. This equates to about $1.25 to $1.67 per serving. For a more economical option, consider using frozen pears when fresh ones are out of season, or buy in bulk to save on costs.
Kitchen Hacks
To make peeling and slicing pears easier, use a vegetable peeler for quick skin removal. For even slices, a mandoline slicer can save time and ensure uniformity. If you want to add a touch of tartness to balance the sweetness, sprinkle a bit of lemon zest over the pears before baking. And to save on cleanup, line your baking dish with parchment paper for easy removal and less scrubbing!
Recipe FAQs
1. Can I use canned pears for this recipe? Yes, make sure to drain them well and reduce the sugar since canned pears are often packed in syrup.
2. What’s the best type of pear to use? Bartlett and Bosc pears are great choices for their sweetness and texture.
3. Can I double the recipe? Absolutely! Just use a larger baking dish and adjust the cooking time accordingly.
4. How long should I bake it? Bake for about 30-35 minutes, or until the topping is golden brown and the pears are bubbly.
Pear Crisp
This Pear Crisp recipe is a delightful dessert that perfectly balances the sweetness of ripe pears with a crunchy oat topping. It’s the kind of comfort food that evokes cozy autumn evenings, yet it’s accessible enough to enjoy any time of year.
Ingredients
- 4 cups ripe pears, peeled, cored, and sliced
- 1 tablespoon lemon juice
- 1/2 cup brown sugar
- 1 teaspoon cinnamon
- 1 cup rolled oats
- 1/2 cup all-purpose flour (or gluten-free flour)
- 1/2 cup unsalted butter, melted (or coconut oil for a vegan option)
- 1/4 teaspoon salt
- 1/2 cup chopped nuts (optional)
Instructions
- Preheat your oven to 350°F (175°C).
- In a large bowl, toss the sliced pears with lemon juice, 1/4 cup of brown sugar, and cinnamon until well coated. Pour the mixture into a greased baking dish.
- In another bowl, combine the rolled oats, flour, remaining brown sugar, melted butter, and salt. Mix until crumbly and well combined.
- Sprinkle the oat mixture evenly over the pears in the baking dish. If using, sprinkle chopped nuts on top.
- Bake for 30-35 minutes, or until the topping is golden brown and the pears are bubbling.
- Allow to cool slightly before serving warm with ice cream or whipped cream.
Nutrition Information
Yield
8Serving Size
1Amount Per Serving Calories 307Total Fat 17gSaturated Fat 8gTrans Fat 0gUnsaturated Fat 8gCholesterol 31mgSodium 96mgCarbohydrates 38gFiber 4gSugar 19gProtein 4g
TastyFitnessRecipes.com, occasionally offers nutritional information for recipes contained on this site. This information is provided as a courtesy and is an estimate only. This information comes from online calculators. Although tastyfitnessrecipes.com attempts to provide accurate nutritional information, these figures are only estimates.
Final Thoughts
In conclusion, this pear crisp recipe is not only simple to prepare but also delivers a warm, comforting dessert that everyone will love. With its delightful combination of textures and flavors, it’s perfect for any occasion, from cozy family dinners to festive gatherings. Don’t hesitate to make this delicious dessert and impress your loved ones with your baking skills! Enjoy every bite of this delightful treat!